This post may contain affiliate links. Please read our disclosure policy.
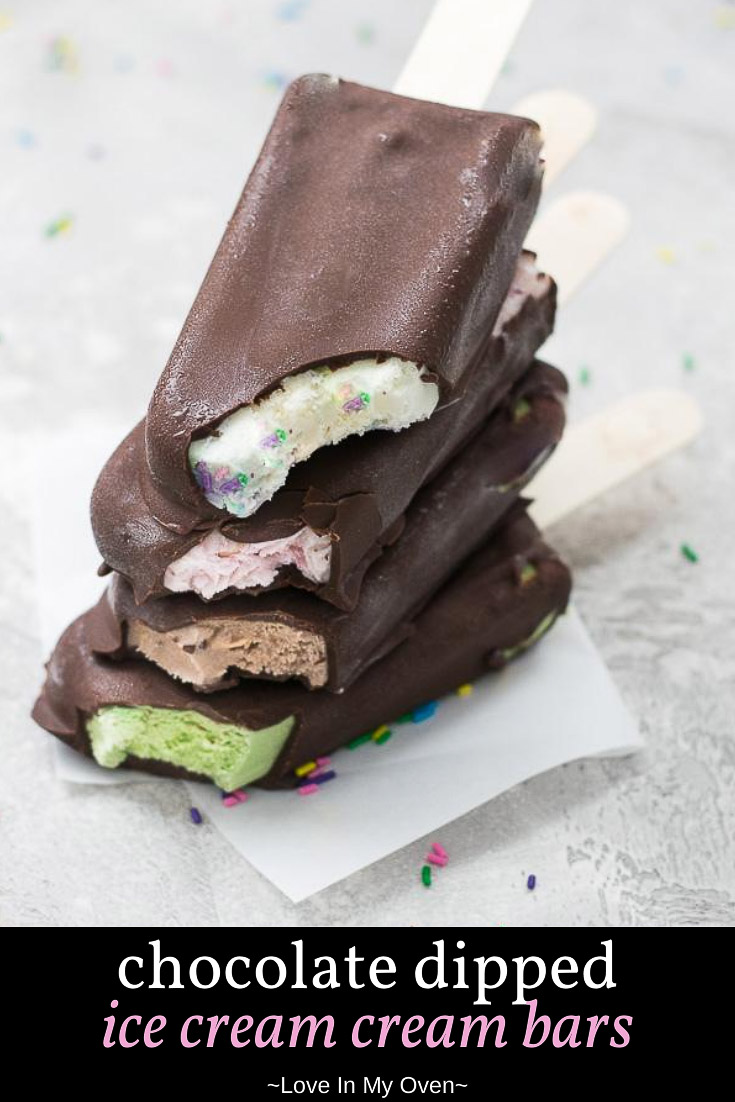
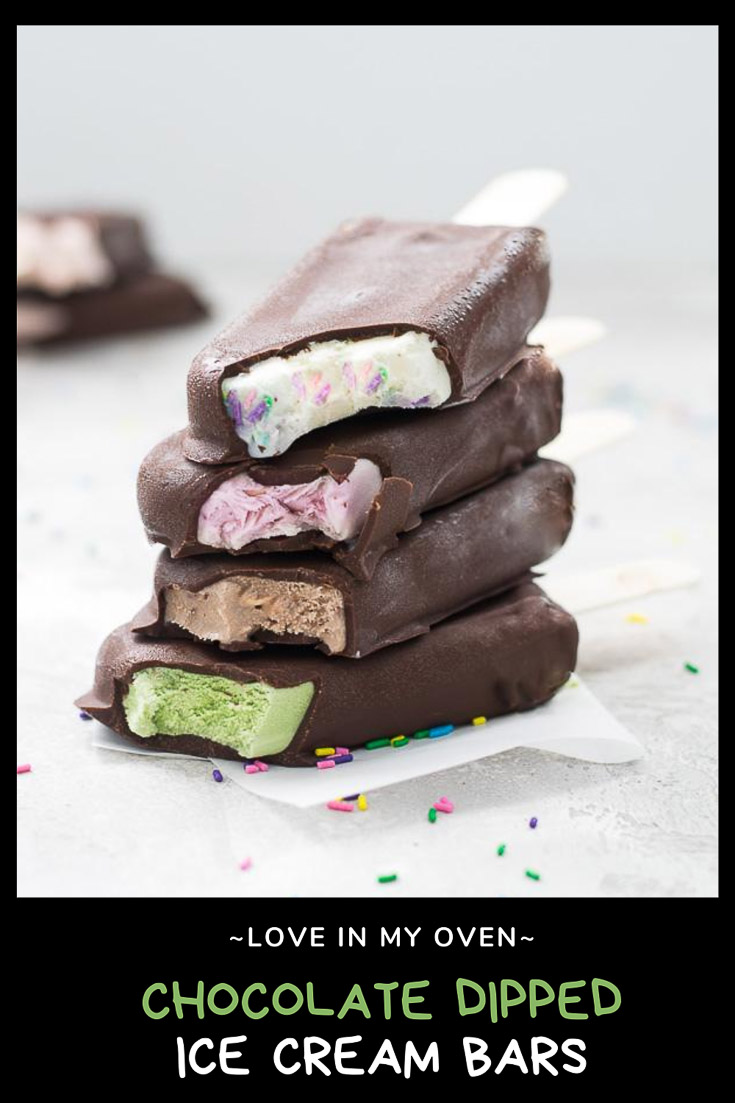
Everything tastes better on a stick! Give these 3 ingredient chocolate dipped ice cream bars a try and you’ll love it! Try this technique with any flavor of ice cream!
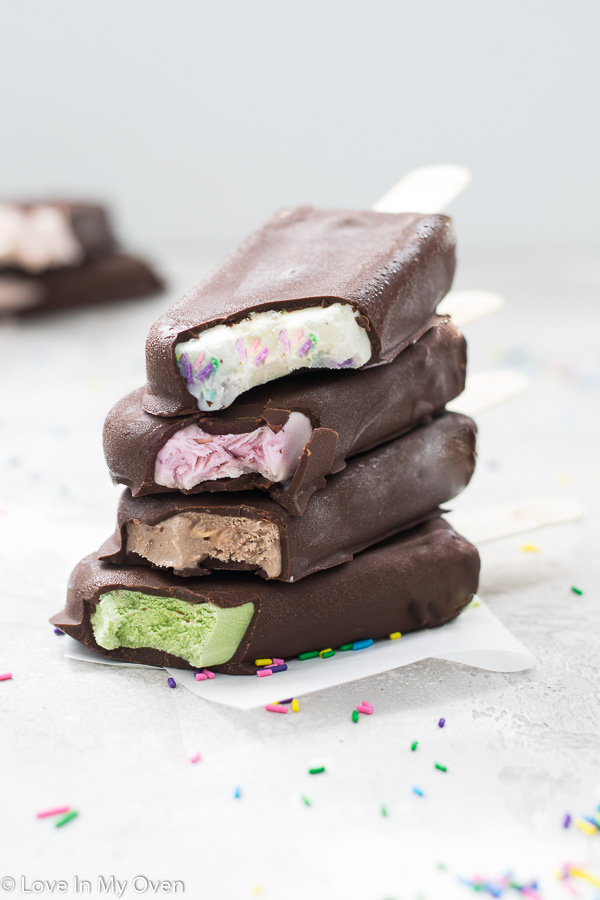
Growing up, did you have a favorite summer treat? I can’t think of anything specific that I couldn’t get enough of, but I can definitely think of a few treats that I did love! Orange creamsicles, for one. Slushies. And revels. At least, that’s what we called them growing up. I’m not sure they’re still called that…or maybe it was just a family thing? Or Canadian thing? I don’t know. Either way revels are sooooo good! I mean, could there be anything better than ice cream on a stick, smothered in chocolate!?
Typically revels (or we can just call them chocolate dipped ice cream bars) are plain vanilla with a dark chocolate shell. The REALLY fun thing about making your own is that you can use ANY flavor of ice cream!
Speaking of which, what’s your favorite?!
I can’t pick, but I do really love anything with chocolate, caramel and chunks of something. Like Rolo. But I also really love licorice flavor. I know that’s weird for a lot of people, but I just love it!
So, on to these bars.
Did I mention you only need 3 INGREDIENTS?!
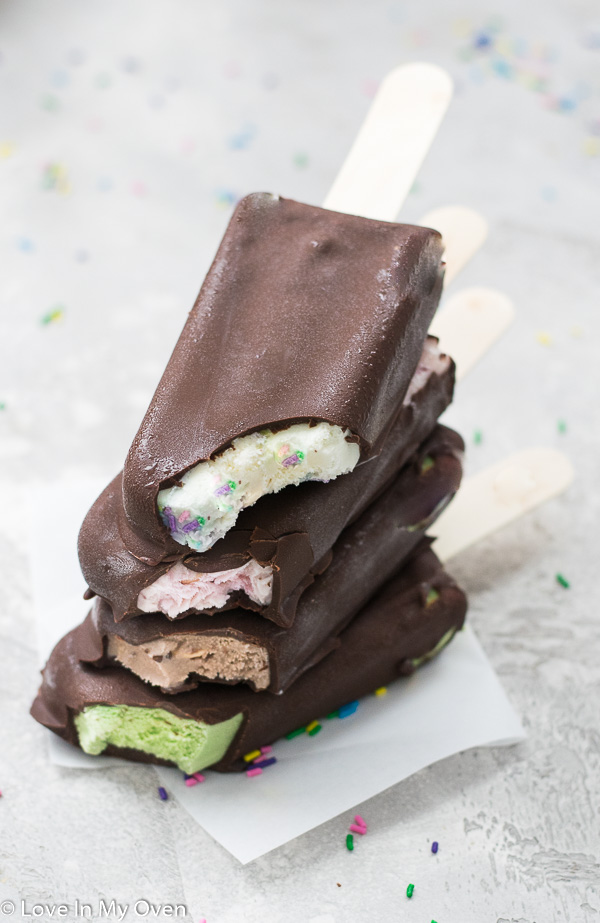
How do you make chocolate dipped ice cream bars?
As I mentioned, you only need 3 ingredients for these bars!! Ice cream and……chocolate.
Start with the ice cream!
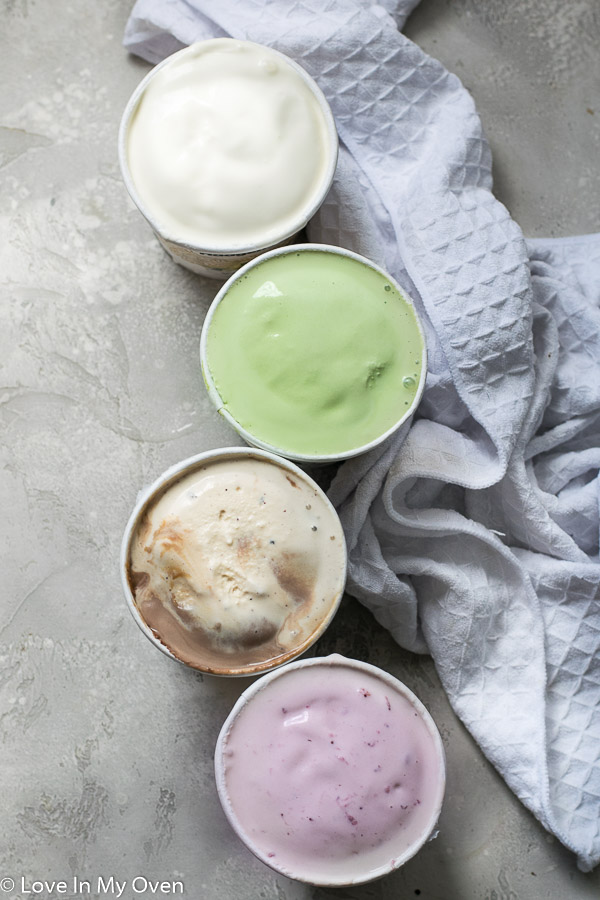
So there’s 2 methods for the ice cream for these bars. You can start from scratch with a no-churn ice cream recipe (I’ve got quite a few to choose from on the blog) and pour the ice cream before it’s frozen into your mold of choice, or you can use store-bought ice cream that has softened a little.
If you’re using store-bought ice cream, you only want to thaw the ice cream enough to make it soft and scoopable, about 10 minutes at room temperature.
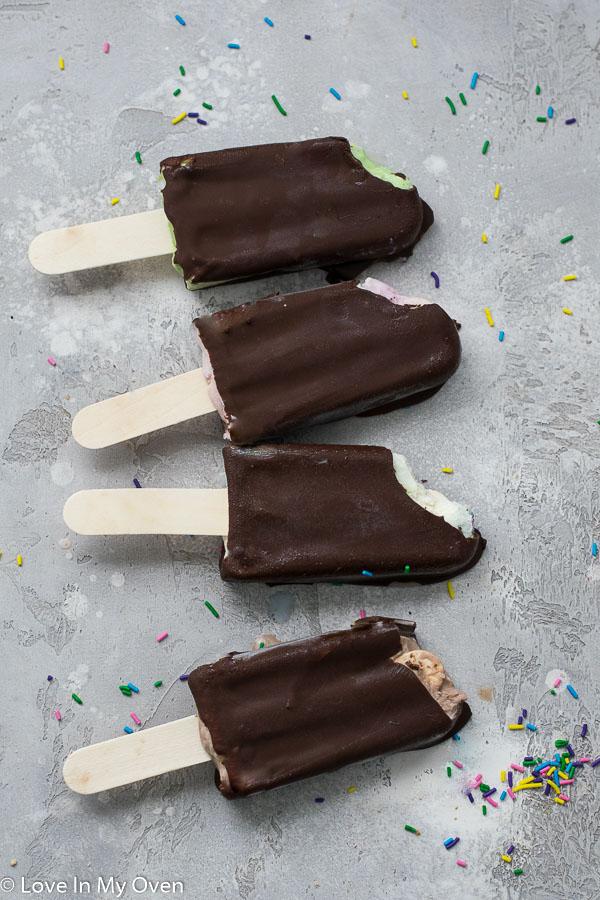
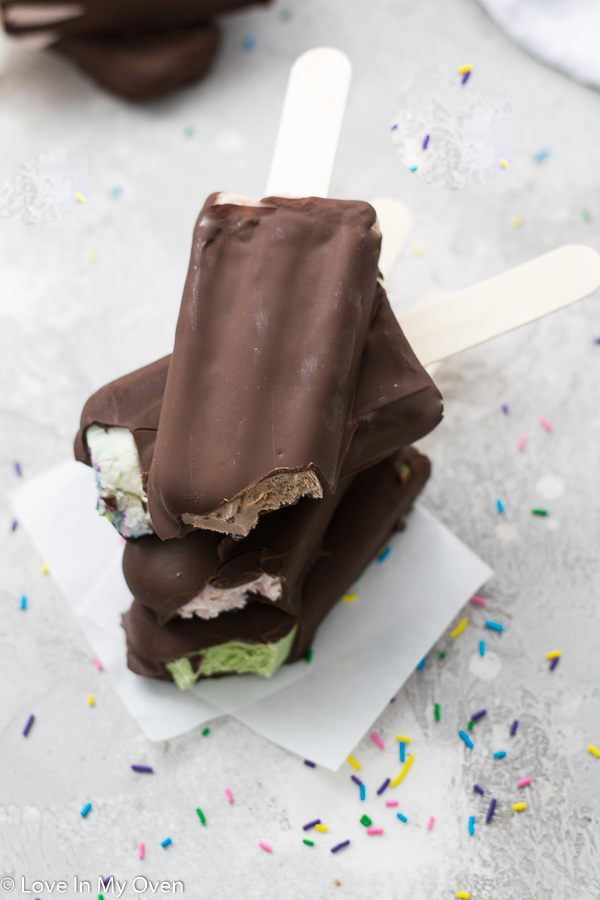
For these photos I went with 4 different flavors: vanilla bean, matcha, salted caramel and strawberry. My fave was the salted caramel!
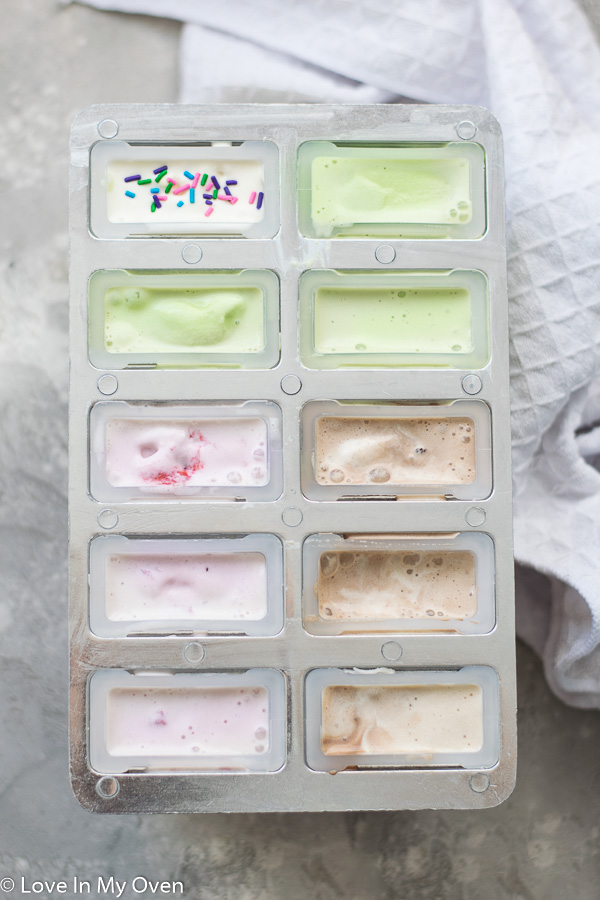
Once you have a pourable/scoopable ice cream, fill your popsicle molds up to the top, making sure the ice cream is packed in well with no air bubbles. Freeze the popsicle molds for about 40 minutes before removing from the freezer and inserting a stick in each one. You need to make sure the ice cream is very, very frozen before you start dipping them in chocolate! I usually freeze them for at least 4-5 hours.
This is the popsicle mold I have but you can use any mold you’d like. The silicone ones would work really well too!
When you’re ready to dip the ice cream bars, melt chocolate with a bit of coconut oil until it’s silky smooth. The coconut oil is what gives the chocolate that nice snap once it’s frozen!
Remove the ice cream bars from the mold and keep them in the freezer. I usually run my mold under warm water until the bars pull out easily. Keep the bars in the freezer, on a baking tray lined with wax paper or silicone until you’re ready to dip. Remove them from the freezer one at a time and quickly dip it into the chocolate, placing it back into the freezer.
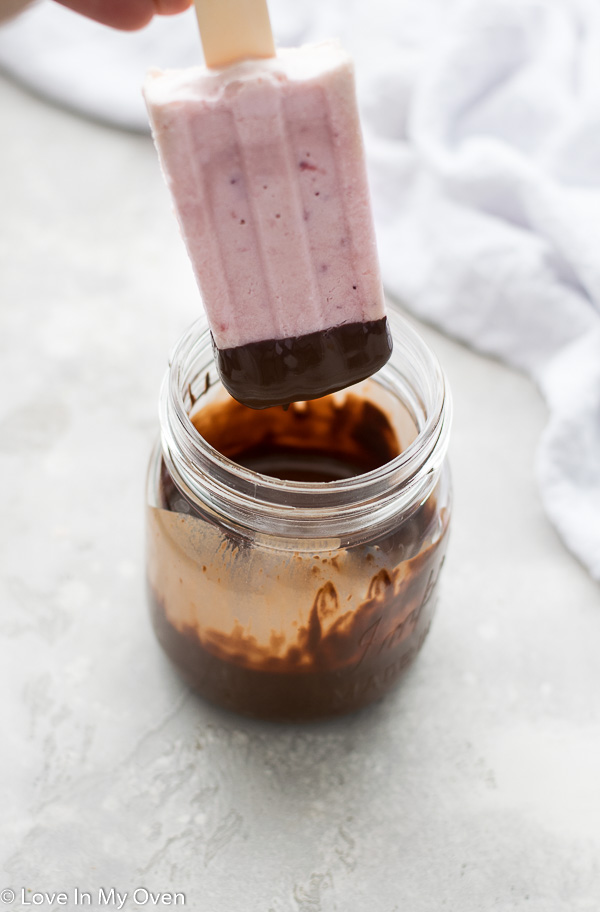
What kind of chocolate should you use for these ice cream bars?
I just used semi-sweet chocolate chips for this recipe, but you could really crank things up a notch and use very high quality chocolate, like Callebaut or Lindt! Really any chocolate of choice will do. Even white chocolate would be delicious!
How long do these ice cream bars last in the freezer?
Once the bars are frozen, you can remove them from the baking tray to a freezer bag and seal it, and these would last for a couple of months! If your family is like our family though, they won’t last long at all 😉
We have a HOT week of summer ahead of us and I can’t wait for it. You can bet we’ll be treating ourselves to a few of these!
Enjoy!
Some of my other favorite ice cream recipes:
Print
Chocolate Dipped Ice Cream Bars
- Total Time: 20 minutes
- Yield: 10 bars 1x
Description
Everything tastes better on a stick! Give these 3 ingredient chocolate dipped ice cream bars a try and you’ll love it! Try this technique with any flavor of ice cream!
Ingredients
- 2 cups ice cream, any flavor OR 1 no-churn ice cream recipe*
- 12 oz semi-sweet chocolate chips
- 2 tbsp coconut oil
Instructions
- Scoop the softened ice cream/prepared no-churn ice cream mixture into a popsicle mold, filling up to the top. Ensure there are no gaps/air bubbles in each mold. Place the mold into the freezer for 40 minutes (set a timer!!!) and then insert a popsicle stick into each mold. Freeze the bars for 4-5 hours.
- In a microwave safe dish, melt the chocolate chips together with the coconut oil in 30 second increments, stirring until smooth and glossy. Allow the chocolate to come to room temperature.
- Remove the popsicle mold from the freezer. Run warm water over the base of the mold and then carefully extract each ice cream bar from the mold by pulling on the popsicle stick. Place the bars on a baking tray lined with wax paper** and return the tray to the freezer.
- One at a time, remove an ice cream bar from the freezer, dunk it into the chocolate up to the top of the stick, and then place the bar back into the freezer, on to the wax paper. Repeat with the remaining bars. Freeze for 1 hour before enjoying, or removing the bars from the tray and placing them in a freezer bag, sealing it tightly and storing it in the freezer for up to 2 months.
Bars should keep just fine for up to 2 months in the freezer bag.
Notes
*If using pre-made ice cream, let it sit at room temperature for 10 minutes before scooping. If using a no-churn ice cream recipe, prepare the recipe as is up until placing it in the freezer (you’ll be pouring the mixture into the molds).
**Make sure you use wax paper. The ice cream will stick to parchment paper!
- Prep Time: 20 minutes
- Category: ice cream
- Method: freezer



Oh, my gosh, I’d eat that salted caramel one in an instant!! My family would probably all want chocolate—gotta treat them this summer!
Yes you definitely gotta treat them in the summer, everyone deserves a treat after this crazy year!!
Oh my goodness, these bars are just gorgeous!! They look scrumptious–your 3 ingredient recipes are genius!! 😀
Thanks Catherine! They’ve been really fun this summer!!
I am loving these! Just the other day we were talking about not finding too many chocolate dipped ice cream flavors – time to make our own! Luckily I have the exact same mold:) On it! Pinned.
Definitely time to make your own – it’s so easy. Why not!? I’m glad you have the same mold too!! It works great. Thanks Milena!
My husband would gobble up the whole stack and not feel one bit bad about not sharing Katherine! He LOVES chocolate dipped ice cream!
Haha, too funny! You will have to make too batches, then. One whole one for him and one for the rest of you!
I’ve heard them called revels but we always called them polar bars. They were a fave of mine as a kid and still are to this day. When we vacation at Disney, I always enjoy their Mickey shaped ice cream bars! I need to try this recipe with some nice cream!
Ooh yes I know the Mickey ice cream bars you mean! So tasty!! I love the idea of doing it with nice cream 🙂 Let me know how that goes!
This is such a fun idea Katherine! I definitely need to make some with my girls!! Creamsicles and slushies were a childhood favorite for me too! Although I honestly still enjoy both now too.☺️
Oh yes, we had a ton of slushies growing up too! So good! I haven’t had one in forever, but now I’m craving it!!
Brilliant Katherine! Can’t wait to try your recipe with a batch of our nice cream. The coconut oil is the secret ingredient for this recipe. I bet the kiddos are in second heaven. Shared to all of our favorite boards.
Thank you!! I love the idea of making this with nice cream. I will have to try that soon too!
Hi I’m doing ice cream as a business if you can give me some new tips and good ideas for that would be great help 😉.
Thanks
Does the type of coconut oil matter? I tried with just chocolate wafers since I didn’t have coconut oil in hand, and the chocolate was way too thick.
Yes the coconut oil is essential to thin out the melted chocolate to make it easier for dipping. It does not matter the type, just 100% pure coconut oil.
Be aware, silicone molds do not work. I tried. The ice cream would not slide out as described and the sticks came out though I tugged gently. I ended up scooping out the ice cream once softened. Regarding this application, metal would be the only option for the molds imho.