This post may contain affiliate links. Please read our disclosure policy.
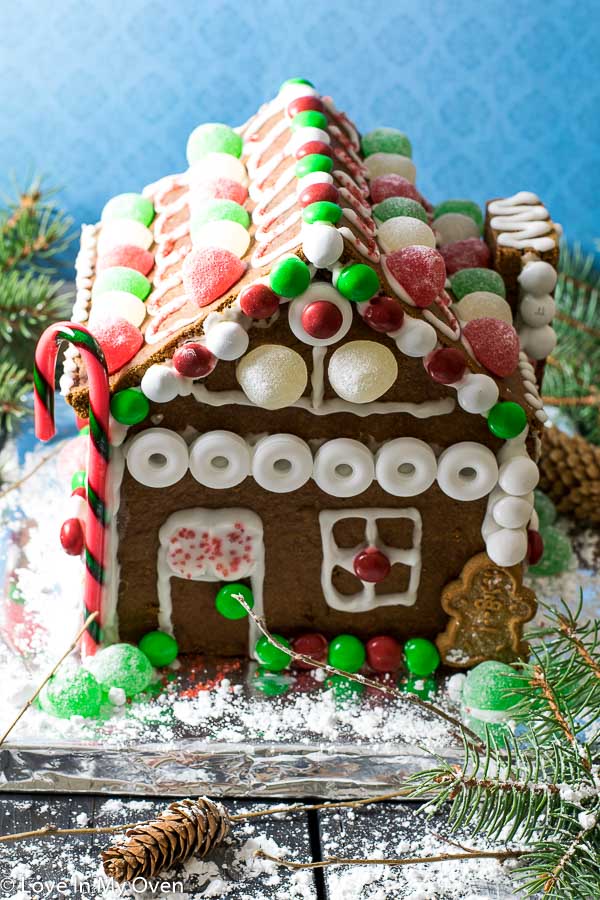
This year, you need to make a DIY gingerbread house! Easy gingerbread houses start with the easiest gingerbread house patterns. You will have so much fun decorating this cute little house that actually tastes good!
*Please note* this post was originally published in December 2017. I have updated the text but the recipe remains the same
Ok, so you may be wondering why you would ever make your own gingerbread house from scratch, when you can easily and cheaply buy a pre-constructed version from pretty much any store this time of year?
Well, I don’t have a great reason WHY you should do it, but chances are if you’ve made it to this page you’re a little like me and love to bake from scratch and enjoy the whole process of certain activities. Plus, have you ever tasted those pre-constructed gingerbread houses? To me, they taste like the cardboard they came in (said with my nose up in the air).
My recipe for this gingerbread house is super easy and basic, and it tastes great. I used the leftover scraps of dough to make gingerbread men with my boys, so really, I’m giving you a two-for-one here. You’re welcome.
What do I need to make a gingerbread house?
If you’re freaking out about the dimensions and already wondering where on earth your ruler is, don’t worry. At the bottom of this post you’ll find a super easy template to use with the correct dimensions, ready to print and use. PS – one of my number one gadgets to keep in the kitchen is a ruler. You have no idea how much this thing comes in handy! Biscotti comes to mind 😉
You’ll want to start this whole process by first making your dough, as it needs to chill at least 30 minutes before rolling out. This dough recipe has that classic molasses taste that we can expect from gingerbread, and a few basic baking ingredients pull it all together. Butter, flour, brown sugar…you get it. I also love this recipe because there are no raw eggs in it, so I can stuff scraps of dough in my face without any nagging in the back of my mind (#shameless).
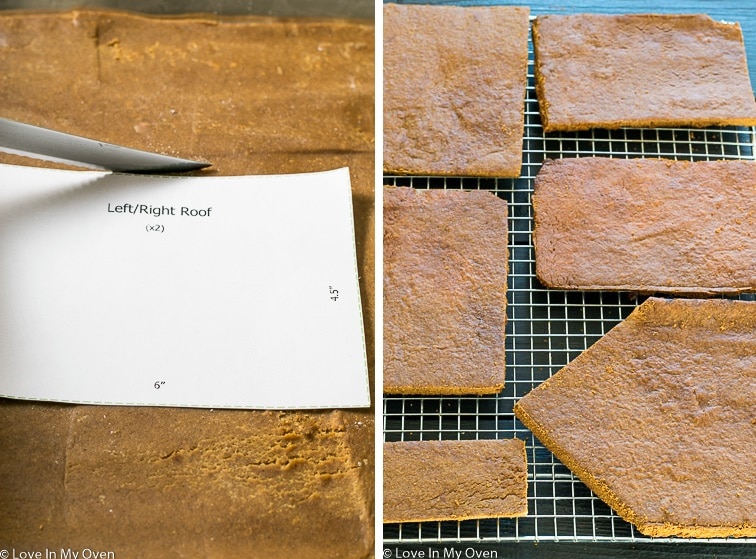
While your dough is chilling, print out the templates for the house and cut along the lines.
Once the dough is ready to roll – literally – split it in half, and use a rolling pin and a lightly floured surface to roll it out into 2 large rectangles, about 1/4″ thick. If you have rimless cookie sheets, you could roll the dough right on top of it.
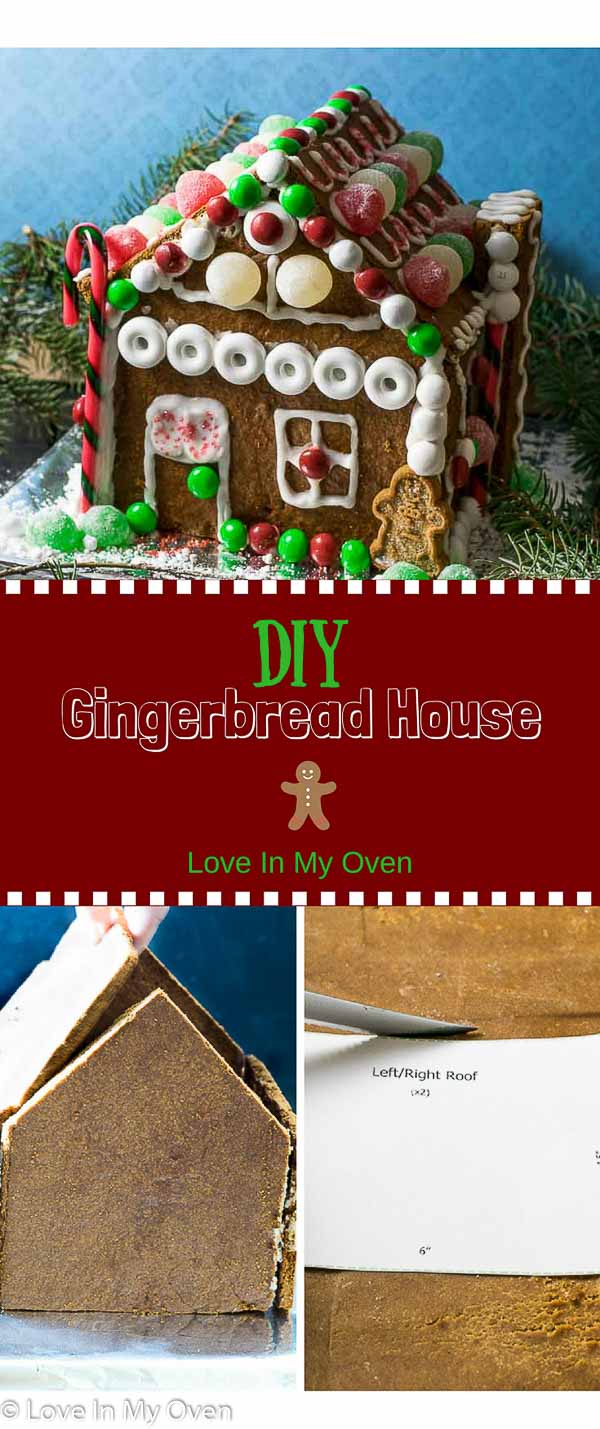
Place the cut out patterns on top of the dough, and use a sharp knife to cut as close to the edge of the paper as possible. Leave the outlined dough in place, and bake as is. Once the dough has baked, place the patterns on top of the outlined sections and trim the shapes.
Make sure the sides are shorter than the roof after baking; if not, you can trim them by about 1/2″. Remove the pieces to a rack to cool completely.
What do I use to stick the gingerbread house together?
I used a classic royal icing to stick the decorations in place, but thanks to a tip from a crafty friend, I decided to use a syrup to glue the actual house together. The syrup is a simple mixture of sugar and water, cooked long enough to caramelize and become sticky. The syrup dries nearly clear, plus it dries QUICKLY – eliminating the need to prop up the pieces together in place until they dry.
Tip: When you’re making the syrup, make sure you don’t simmer it too long, just until it turns into syrup, otherwise it will crystalize! When things start to get thick and sticky, turn the heat off and remove the pan from the stove.
I assembled the house by sticking the front and back to the sides, and then adding the roof. I added the chimney at the end, once the house was dry and stable. The best way to apply the syrup is by using a pastry brush!
What kind of candy is best for a gingerbread house?
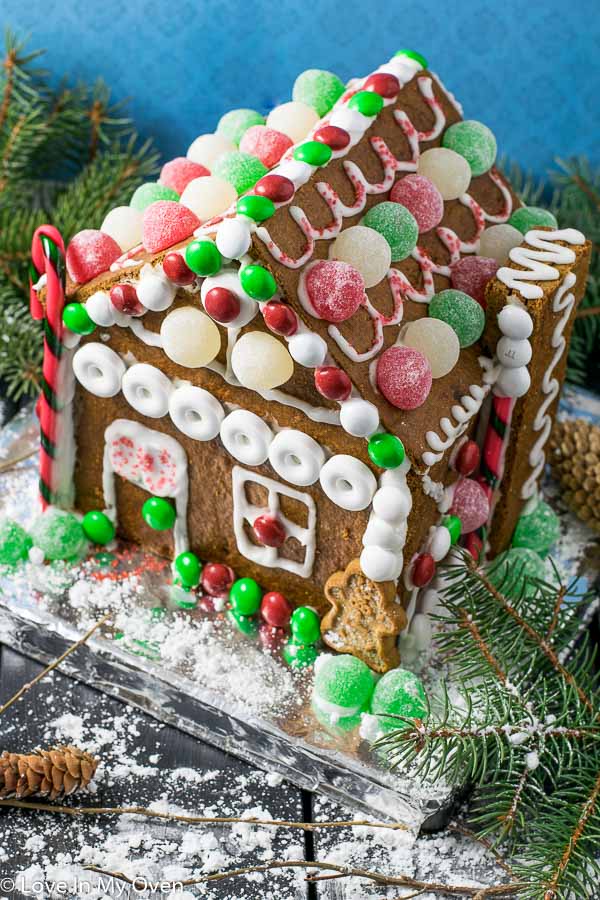
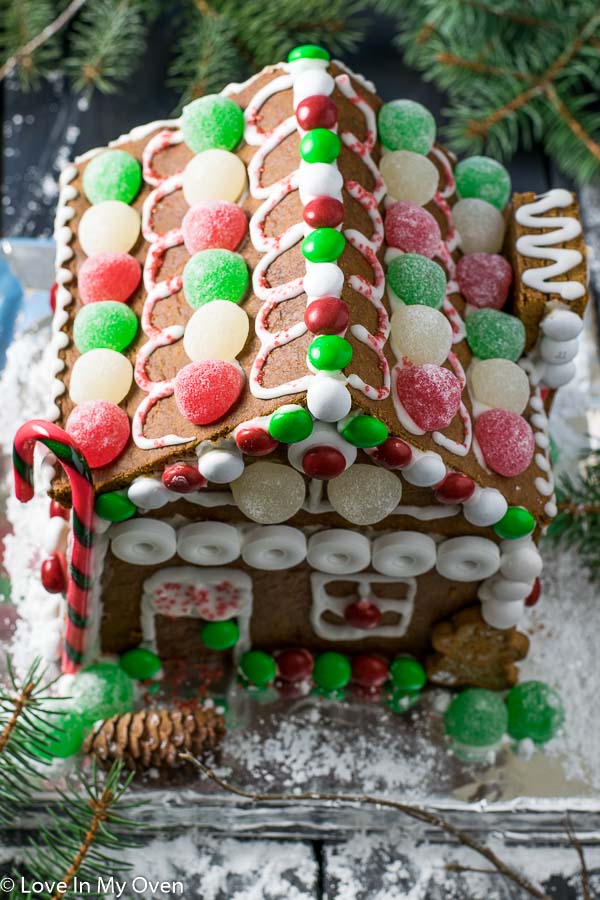
Once the house is assembled, whip up some royal icing and decorate away! You can use whatever you want, but I used peppermint M&M’s, mint lifesavers, and holiday gum drops. You want to stay away from very heavy candies, and flatter, smaller candies are better (think M&M size).
It’s impossible not to eat a million candies while you’re decorating, so I suggest assembling this house with an empty stomach!
How long can a gingerbread house last?
The house will be edible for 1-2 weeks, but after 1 week it’s going to be pretty hard, and the candies could be liable to break some teeth. If you’ve got young kids like me, there’s no way that house will even last 1 week without being picked over.
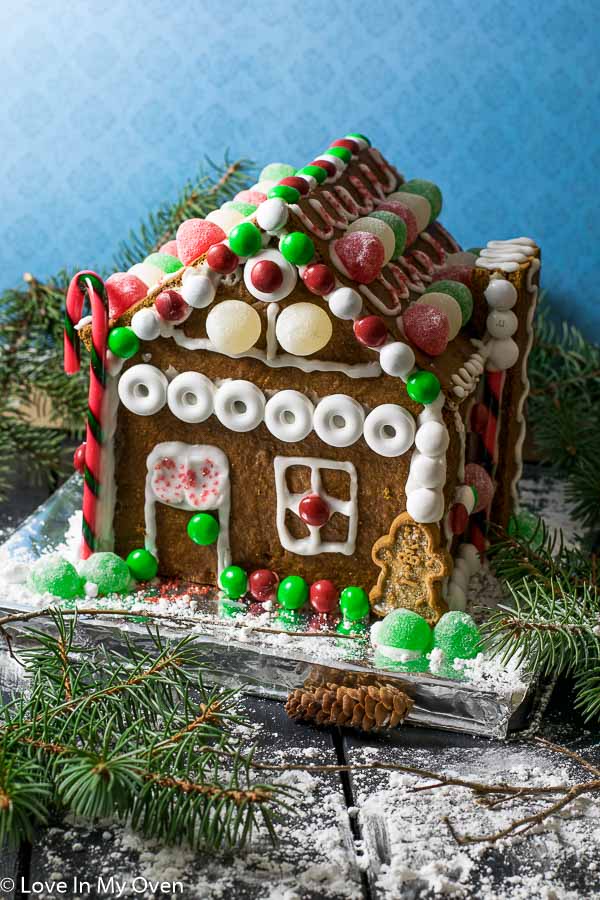
So, grab your piping bag and rolling pin, and make yourself a gingerbread house that will see Hansel & Gretel come running!
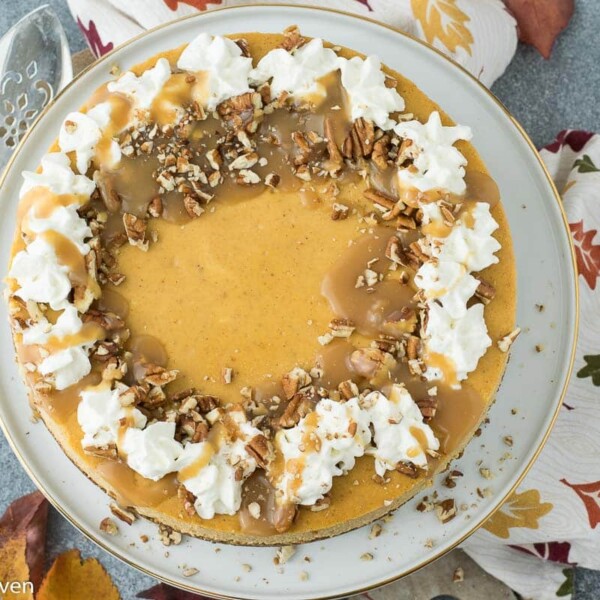
More fun Christmas goodies:
Print
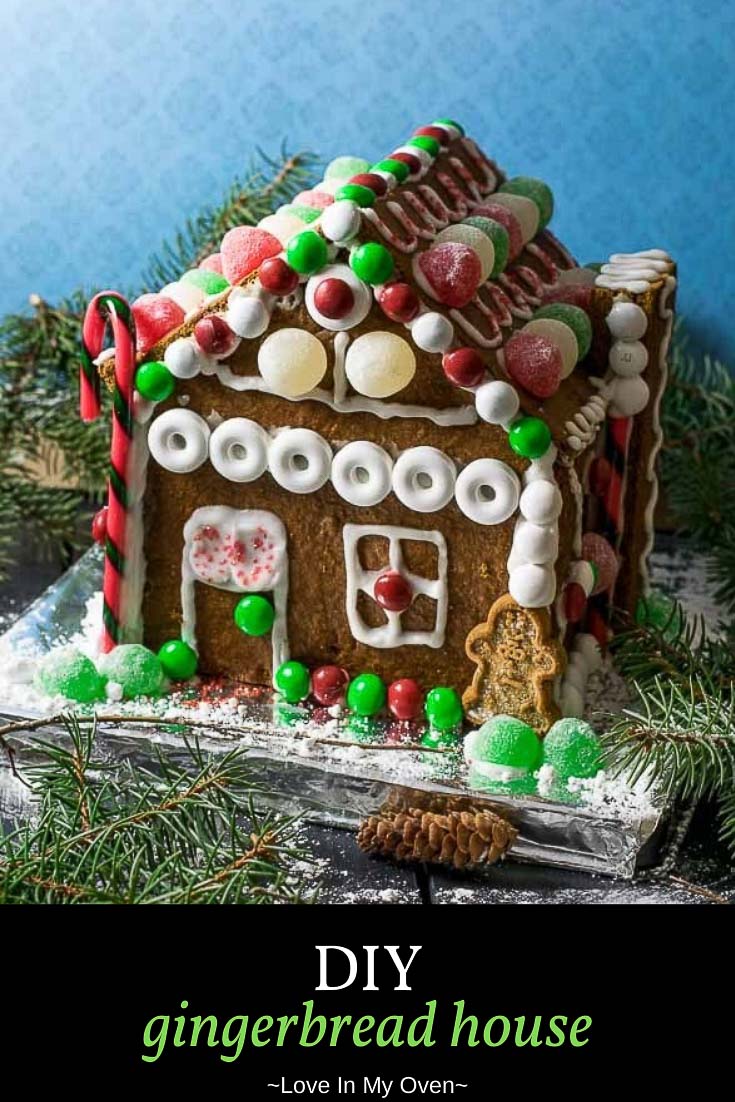
DIY Gingerbread House
- Total Time: 2 hours 20 minutes
- Yield: 1 house 1x
Description
Forget the store-bought house in a cardboard box. Use this super simple recipe and template to craft your very own made-from-scratch gingerbread house!
Ingredients
Gingerbread Dough
- 1 cup unsalted butter, softened to room temperature
- 3/4 cup brown sugar
- 1/2 cup fancy molasses
- 1 tsp pure vanilla extract
- 2 tbsp cinnamon
- 1 tbsp ground ginger
- 1 tsp all-spice
- 1 tsp baking soda
- 3 3/4 cups all-purpose flour
- 1/4 cup water
Caramel Syrup
- 1 1/3 cups sugar
- 3/4 cup water
Royal Icing
- 1 tbsp egg-white substitute
- 3 1/2 – 4 cups powdered sugar
- 1 tsp water
Assorted candy, for decorating
Instructions
- Prepare the dough. Using an electric mixer or a stand mixer fitted with the paddle attachment, cream the butter until soft and fluffy. Add the brown sugar, molasses, and vanilla extract and beat until combined. Add the spices and baking soda. Slowly add the flour and water and mix just until a stiff dough forms. Place the dough in the fridge for at least 30 minutes to chill.
- While the dough chills, print and cut out the templates for the house (found at the end of this recipe). You will need two of each, other than the chimney.
- Preheat the oven to 375 F and line two large baking sheets with parchment paper or a silicone baking mat*. Divide the chilled dough into two, and using a lightly floured surface, roll each section out into a large rectangle, about 1/4″ thick. Place the cut-outs on top of the dough and using a sharp knife, outline around the cut-outs, keeping the outlined pieces in place. Remove the paper, and bake the dough for 13-15 minutes or until the dough feels firm to the touch. Allow to cool 5 minutes.
- Place the cut-out patterns on top of the outlines again and trim to ensure the pieces are the correct size. You will want to make sure the sides are shorter than the roof, at least by 1/2″. Sometimes the pieces spread in the oven, so trim the sides as necessary. Place them on top of the roof pieces to see. Remove the cut-out pieces and place on a wire rack to cool completely.
- Once the shapes have cooled, prepare the surface for the gingerbread house. I used a small cookie sheet wrapped in foil.
- Prepare the caramel syrup*** Stir together the sugar and water until combined, in a small saucepan. Bring the mixture to a boil, then reduce heat and simmer until a caramel syrup is formed, about 15 minutes. It will look thick and syrupy. Once the syrup forms, turn off the heat and remove the saucepan, or the syrup will crystalize. Using a pastry brush, use the caramel immediately to glue the house together. Starting with the sides of the house, apply the caramel to one end and hold it against the front or back of the house, holding in place for a few minutes until hardened. You can also use chip clips or any other props you have around to keep the pieces propped up while drying. Work quickly to assemble the rest of the house. If you’re using royal icing instead of the syrup, wait 30 minutes before adding the roof to the house. I glued the chimney last. If you’ve chosen to place the chimney on the side vs the back of the house, it may be too tall. Trim 1-2 inches off the end.
- Prepare the royal icing. Allow the house to rest for at least a couple of hours to really set before preparing the icing to decorate. In a medium bowl, use an electric mixer to beat together the egg whites and water with the powdered sugar. Add more water or more powdered sugar to achieve the right consistency. It should be thick enough to hold candy in place, but thin enough to pipe through a piping bag.
- Use a piping bag to decorate the house, holding candy in place for a few seconds until it sticks. Leave the house in place until everything has hardened, about 15 minutes. Display, then enjoy immediately!
Gingerbread house will keep at room temperature for 3-4 weeks, but will be much less edible after 1 week.
Notes
- If you own rimless baking sheets, roll the dough right onto the baking sheet.
- Use gum drops, M&M’s, licorice, marshmallows, gum drops and lifesavers to decorate.
- If you’d prefer not to use syrup to glue the house together, you can also just make extra royal icing and use that instead!
Caramel syrup adapted from Martha Stewart.
- Prep Time: 1 hours
- Cook Time: 20 minutes
- Category: sweet tooth
- Method: DIY
- Cuisine: Christmas Baking
Gingerbread House Templates
Print two copies of “front and back” as well as “chimney”.


Whoa! I bet this tastes and looks way better than the boxed version as well! Looks so adorable! I bet your kids were ecstatic, like any little one would be! Pinning and have a wonderful weekend!! 😀
Thanks Kim!! Oscar can’t stop grabbing at it, haha so I don’t think it’ll last much longer on display! Have a great weekend my friend!
I’ve never made my own gingerbread house from scratch, but what a great idea! Hubby and I picked up a boxed one about 10 years ago with all good intentions of making it over the hoidays and we never did. I think we ended up making it in April or May, lol. I think making everything from scratch would be so much more fun (and tastier). I’m sure your little ones were so happy with this!!
That is SO funny, Dawn! Was it a spring cottage that you ended up constructing? Haha!! If you ever get the urge to construct a delicious house (any time of year) I’ve got your back. Haha cheers my friend!
Are you kidding me? I can’t believe you made that amazing house from scratch! My only experience making gingerbread houses is these disgusting things we made in grade school with used milk cartons (not even our own milk cartons) and conversation hearts leftover from the previous year’s Valentine’s Day. Ummmmm, scarred for life. But I think with your instructions I could make a non-gross one! This is too much fun :). Have a great weekend, Katherine!
Aah words of high praise, Kelsie! Thank you! I think it’s time you upgraded from milk carton gingerbread houses, haha I have never even heard of that. So funny!! You totally sound scarred. Have a great weekend too!
Katherine, this is super cute. I have never made a gingerbread house before and I am absolutely loving this. I have got to try this, but doubt that it will look as cute as this. Thank you for the template to make things easier.
Have a wonderful weekend 🙂
Thank you Ashika!! You haven’t lived until you’ve constructed a gingerbread house 😉 Haha just kidding! But really, it’s so fun! I hope you get a chance to try it. Have a great weekend my friend!
Your gingerbread house turned out beautifully, Katherine! I seriously want to make one!!
You should!! It is so easy – and super fun! Thank you Marissa!
We buy a boxed one every year, and hubby and I have a tradition of assembling it on Christmas Eve! We never eat it though. It’s always just for display! We are just happy if it resembles a house and stays together!!! I’ve always been intimidated by making my own form scratch, but your step-by-step makes it seem manageable! Maybe I will give it a try :). Happy weekend Katherine!
Aw that is a super fun tradition though! I’ve never liked the taste of the boxed ones, so you’re not missing out!! I hope you give it a try sometime!! It really is SUPER simple!! Hope you’re having a great weekend Leanne! XO
You are a true baker Kathy!!! This house looks so professional and beautiful – an artwork indeed!!! The best project to do with kids and spend some quality time as well. Have a great weekend dear:)
Ah you are too sweet, Maria! Thank you! I appreciate the compliments my friend. We had so much fun with the kids decorating (and eating) it. Have a great weekend too!!
You made the entire thing on your own! Bravo!! I am sure the kids had a lot of fun making it with you..It’s like one of those school projects that takes a lot of time and patience…but the result is beautiful! It looks so pretty and festive, perfect to make this time of the year!
Thank you Deepika!! The boys had so much fun (more fun destroying it)!! I’m glad you like the decorating job – I feel like I’d get an A+ if this was a school project 😉 Take care!!
This looks amazing!! I can tell you why to make your own instead of the kits… Because the pieces don’t match up, they collapse as you are trying to get all the sides to meet, lol, grandma bought the kits for the kids this past weekend and we learned our lesson 😉 . Yours look adorable, I want a whole set for the the mantel but my daughter would eat them first, lol. Take care.
Hahah!! Soo funny. I’m sorry your house didn’t work out so great, but I bet your daughter still had some good laughs with her grandma! Next year you’ll have to get them to bake their own from scratch 😉 Cheers!
CUTE!!! But I’m not going to lie, I would probably fail at this recipe. Only because I can’t be trusted around cookie dough. #IHaveAProblem. I imagine I would eat so much dough my dimensions would be off. HA! Just kidding. But in all seriousness, this GB house is adorable. Pinning!
LOL – I have the same problem, Christina! It’s bad with this recipe, because there are no eggs so I don’t feel like it’s “wrong” – other than the sugar haha. Thank you so much for the compliments!!