This post may contain affiliate links. Please read our disclosure policy.
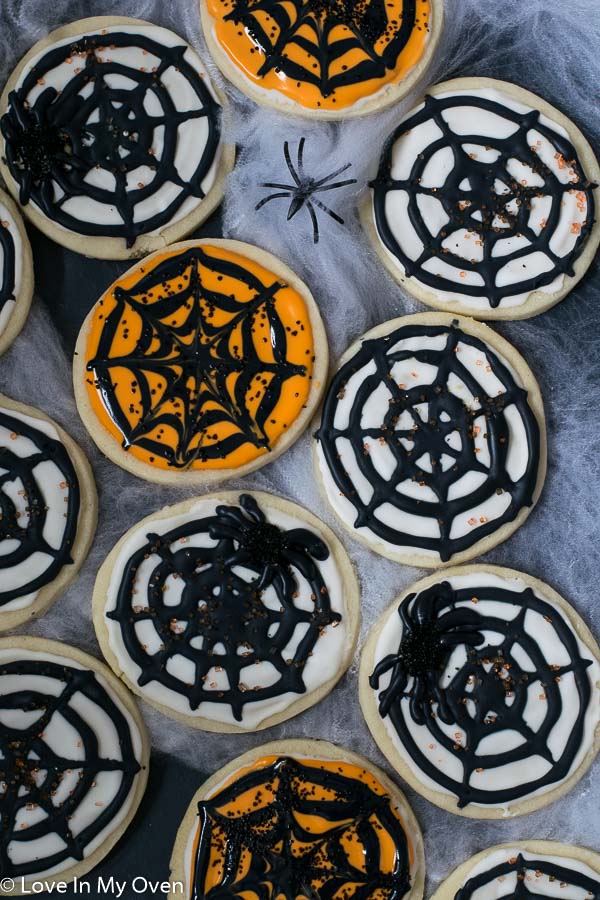
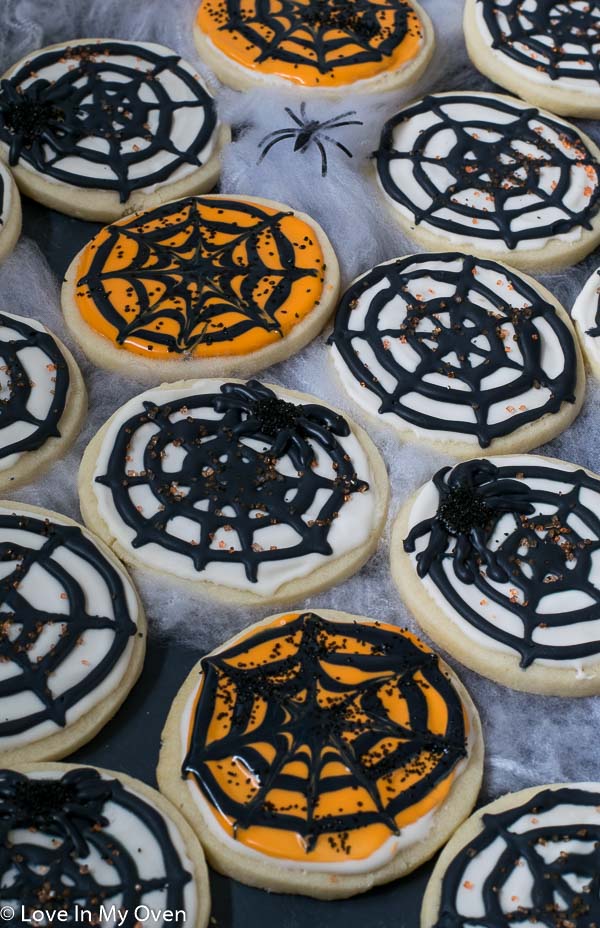
These easy cream cheese cookies are made a little extra fun by turning them into spiderweb cookies! They’re easy Halloween cookies that are sure to delight!
*Please note* this post contains affiliate links that may earn me a small commission, at no extra cost to you
This post and recipe is actually fairly last minute. As you may already have surmised, I have terrible planning skills. I had a hazy plan in my head to make these spiderweb cookies for Halloween in a few weeks (or so I thought) and then I checked my calendar last week and had a minor heart attack. That phrase, “it snuck up on me” ACTUALLY rings true! I don’t know why, but I did not realize how soon Halloween was!!! Which also means, November is right around the corner. WHY does time go so fast!?
Anyway, I present to you, a hastily photographed, yet VERY delicious, easy cream cheese cookie in the form of a spiderweb for Halloween. So fun, right? I’m not going to lie, a plain old sugar cookie never gets me too excited. I mean, they’re an obvious holiday staple and they’re so fun to decorate, but I felt like I wanted a little something extra for these cookies. Cream cheese to the rescue!
If you’ve never had a cream cheese cookie, you’re in for a treat.
How do you make cream cheese cookies?
Butter. Cream cheese. Sugar. Oh, and some flour and a few other things 😉 You’ll want to beat together the room temperature butter, sugar and cream cheese (also room temperature) until smooth, then add in the egg and vanilla and almond extracts.
Mix the wet ingredients slowly in with the dry (flour, baking powder and salt). I like to use my stand mixer for this job but you could use a handheld electric mixer too!
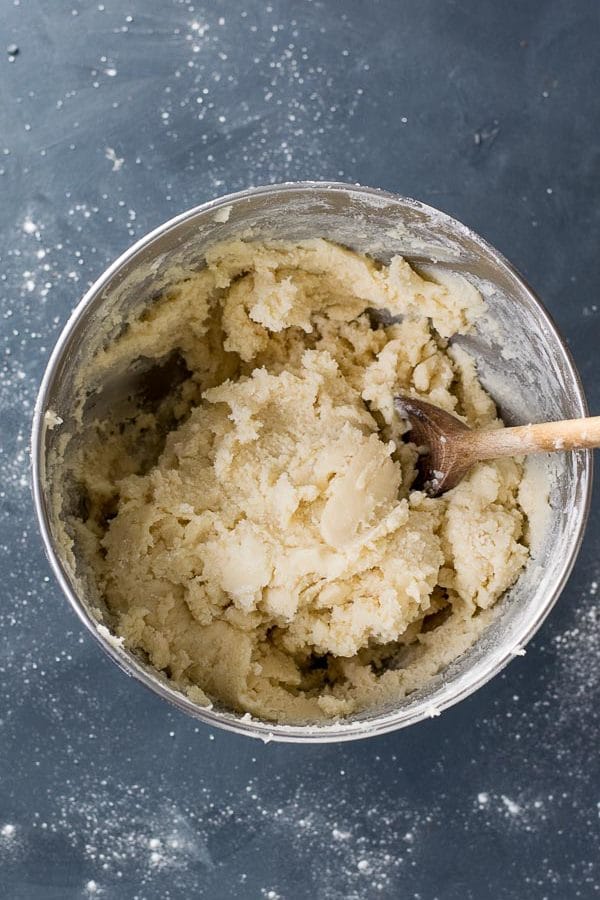
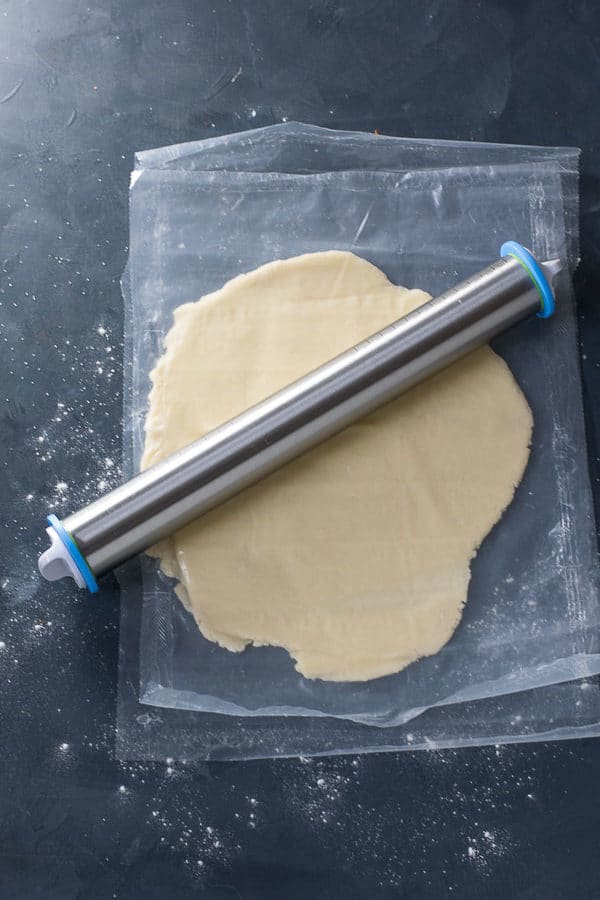
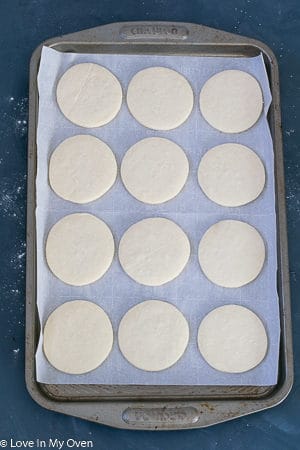
Once the dry ingredients are just incorporated into the wet, the cookie dough must be chilled for at least an hour. You can split the dough into two, forming them into disks and wrapping them in plastic wrap. If you’re making your cookies the same day, what I suggest is to roll out the dough (to about 1/4″ in between two sheets of parchment paper, then place those rolled out sheets in the fridge. You can lay them on top of each other to save space.
Psst – check out my rolling pin below. I got it last year, and I LOVE it! You can set the thickness that you’re rolling to by swapping out the rings on the end for your desired measurement. Game changer!
Here’s the one I bought.
After the dough chills for at least an hour (and up to 3 days), remove it from the fridge and quickly cut out the cookies in your desired shape. For the spiderweb cookies, I used a round cookie cutter. I also made a few pumpkins too!
If the dough starts to get soft while you’re cutting, pop it back into the fridge for 20 minutes before continuing. Trust me, it’s worth it! Chilled dough ensures the cookies keep their shape and don’t spread out too much.
How long do you bake cream cheese cookies for?
These cookies were rolled out to 1/4″ thickness, and they were just perfect after 9-10 minutes. Be sure to remove them when they’re SLIGHTLY browned on the edges. They make look under-baked, but they’ll firm up after a minute or two once you remove them from the oven. Slightly under-baked cookies means soft cookies!

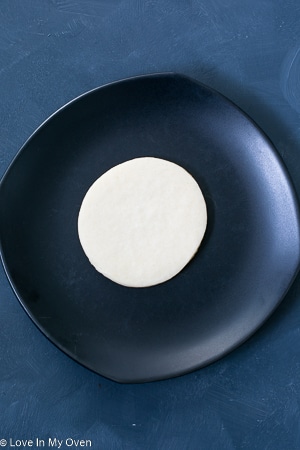
When the cookies have completely cooled, you can get going with the fun part!
Do you have to use egg whites for the royal icing?
If you have a favourite royal icing recipe using meringue powder or a different method, you can certainly use it here! I’ve included my favourite royal icing recipe here because I have good luck with it.
The recipe does use raw egg whites, but if you’re worried about contamination from the egg whites, you can buy pasteurized egg whites that will carry no harm of salmonella!
When you’re whipping up your icing, you can either thin it out by adding a bit of water, or thicken it up with additional icing sugar. You want the consistency to be fairly runny for the spiderweb cookie design.
Once your icing is a consistency that you’re happy with, remove half into either a piping bag fitted with a small round tip, or a squeeze bottle for cookie decorating. The other half can be coloured black with gel food colouring. I highly recommend gel colouring! I like these ones from Wilton.
If you aren’t icing your cookies right away, you can store the royal icing in the fridge, in an airtight container. You may need to add a bit of water to it once you’re ready to work with it, to loosen it up a bit!

How do you make the spiderweb design on the cookies?
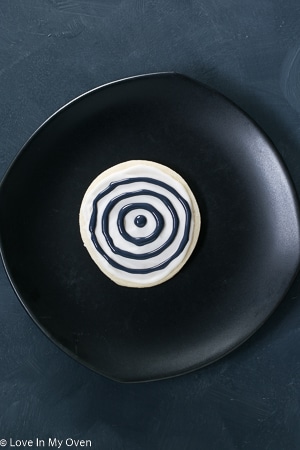
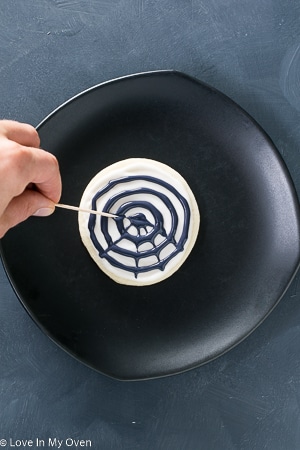
The web design looks pretty intricate, but it is crazy easy to do. I’ve included step-by-step directions below to help you out!
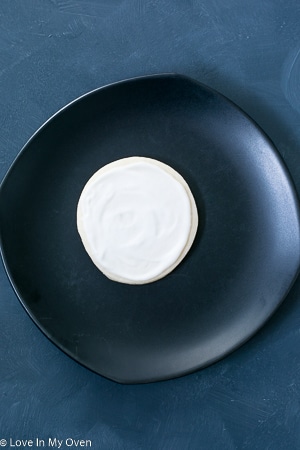
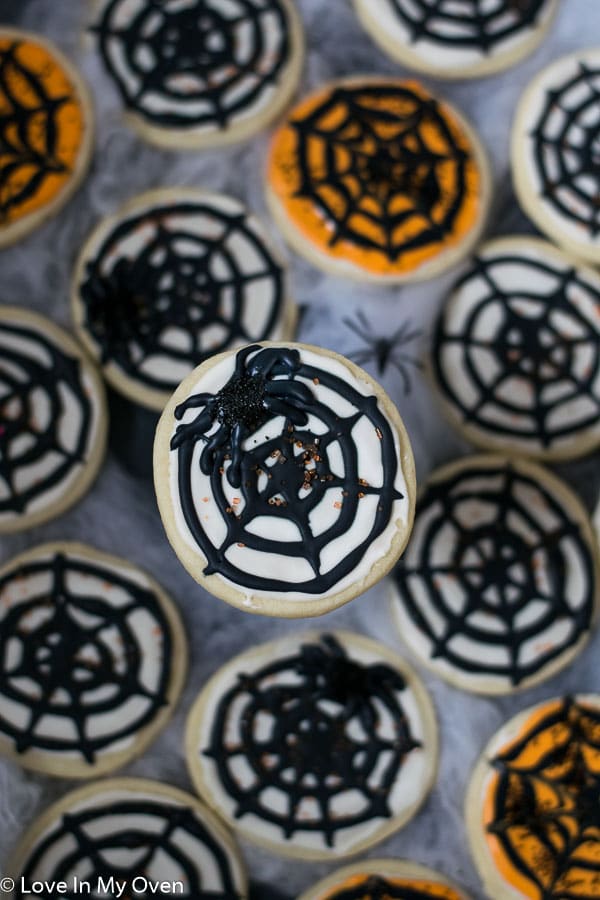
Start by icing the cookie completely in white. Next, while the white is still fresh, pipe a black dot in the middle followed by three round circles around it, leaving about a 1/2″ gap. Then, immediately after doing this, use a toothpick to drag the black from the middle dot to the outer edges. Add sprinkles (if you want) right after.
See below!
Once the icing has set and dried, you’re good to store them in an airtight container until ready to serve! I played around a little with some of them and added a glob of icing to a few, covered it with sprinkles and gave it legs. Instant spider!
So, these cookies are PERFECT for Halloween, obviously, but this cookie recipe is fantastic for Christmas cookies or really any other way you want to decorate them! The cream cheese adds so much to the cookie!
Since I needed to make some cookies for Wally’s preschool Halloween party, I made another batch after the spiderwebs and turned them into pumpkins. Those were pretty fun to decorate, and a lot less messy than an actual pumpkin 😉
Happy Halloween!

Another fun Halloween treat for you are these Halloween cake pops!
And some other cookies:
Print
Spiderweb Cookies
- Total Time: 1 hour
- Yield: 2 dozen cookies 1x
Description
These easy cream cheese cookies are made a little extra fun by turning them into spiderweb cookies! They’re easy Halloween cookies that are sure to delight!
Ingredients
Cookies
- 1 cup unsalted butter, room temperature
- 2 oz full-fat cream cheese, room temperature*
- 1 cup granulated sugar
- 1 egg, room temperature
- 1 tsp pure vanilla extract
- 1/2 tsp almond extract
- 3 cups all-purpose flour
- 1 1/2 tsp baking powder
- 1/2 tsp salt
Royal Icing
- 3 egg whites
- 2 1/2 cups powdered sugar**
- 1/2 tsp cream of tartar
Instructions
- Prepare the cookie dough. In the bowl of a stand mixer fitted with the paddle attachment, or using a handheld electric mixer, combine together the butter and cream cheese on high, until smooth, about 2 minutes. Add the sugar and beat for an additional minute. With the mixer running on low, add the egg, followed by the extracts, and beat for an additional minute.
- In a seperate mixing bowl, whisk together the flour, baking powder and salt. Add the dry ingredients to the wet, adding half first and mixing on slow, then adding the other half. Mix until just incorporated.
- If you will not be baking the cookies the same day, divide the dough into two and shape into discs, wrapping tightly in plastic wrap and storing in the fridge. Cookie dough can be kept in the fridge for 1 hour to 3 days. If you will be baking the cookie later that day, divide the dough into two and place one half on top of a large sheet of parchment paper. Place another piece of parchment paper on top, and roll out the dough to a 1/4″ thickness. Repeat with the second half of dough, with additional parchment paper. Place the rolled out dough in the fridge to chill, for at least 1 hour but no more than 4 hours.
- Bake the cookies. Preheat the oven to 350 F and line two large baking sheets with parchment paper. Working quickly, remove the dough from the fridge and roll out to 1/4″ thickness, or, if you are using the pre-rolled dough, cut your cookies using a cookie cutter and place the unbaked cookies on the prepared baking sheets, about 1″ apart.*** Roll the excess dough and repeat.
- Bake the cookies for 9-10 minutes. Remove them from the oven when the outsides are just beginning to brown, but the tops look slightly under-baked. They will continue to bake for an additional minute or two on the hot cookie sheet. Allow the cookies to cool for 10 minutes on the pan before removing them to a wire rack to cool completely.
- Prepare the icing. In the bowl of a stand mixer fitted with the paddle attachment, or using a handheld mixer, beat together the egg whites, powdered sugar and cream of tartar. Add a touch more powdered sugar to thicken up the icing, or a few teaspoons of water to thin it out. See notes below. Add gel coloring to the mixing bowl, or remove icing to separate bowls and add the color then, using a whisk to incorporate it. If you aren’t using the icing right away, be sure to keep it carefully covered to avoid it hardening!
- Ice the cookies using the spiderweb pattern as shown in the blog post above, or however way you’d like to ice them. Allow the icing to set before storing the cookies.
Cookies will keep in an airtight container, at room temperature, for 4-5 days. You can also store them in the freezer, in an airtight container, for up to 2 months.
Notes
*You can use light cream cheese too, but be sure not to use the spreadable kind from a tub.
**You may have to add more or less powdered sugar, to achieve the desired consistency. You want it to dribble from the spoon fairly easily. Try some on a test cookie before removing all of the icing to your piping bag/squeeze bottle. You can also use a bit of water to thin the consistency.
***If the cookie dough is beginning to soften while you’re rolling and cutting, place the dough back in the fridge for about 20 minutes to firm up again.
- Prep Time: 40 minutes
- Cook Time: 20 minutes


You did a wonderful job with these cookies! They are cute and fun. And I’m sure quite delicious!
Thank you so much!! They were a big hit at the kiddos Halloween parties! 🙂