This post may contain affiliate links. Please read our disclosure policy.
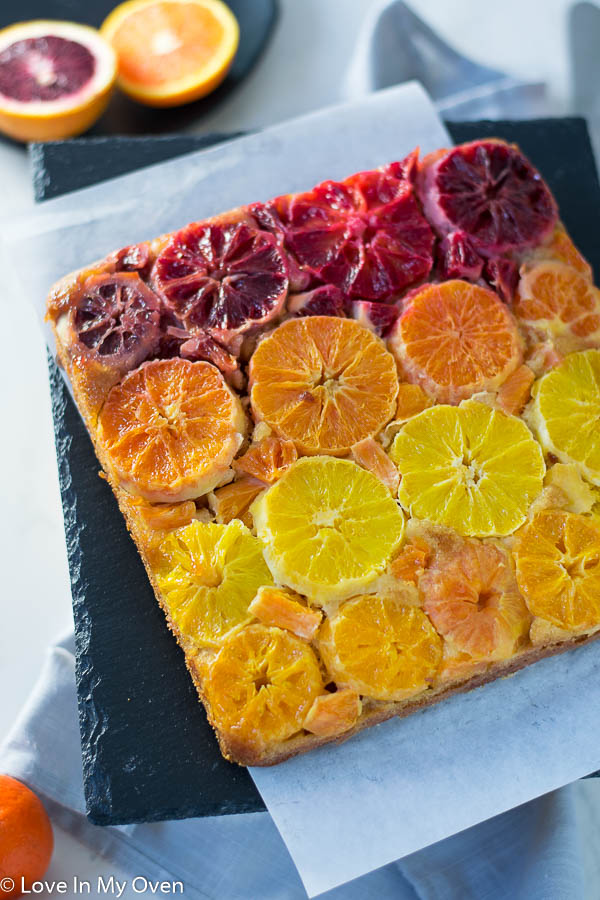
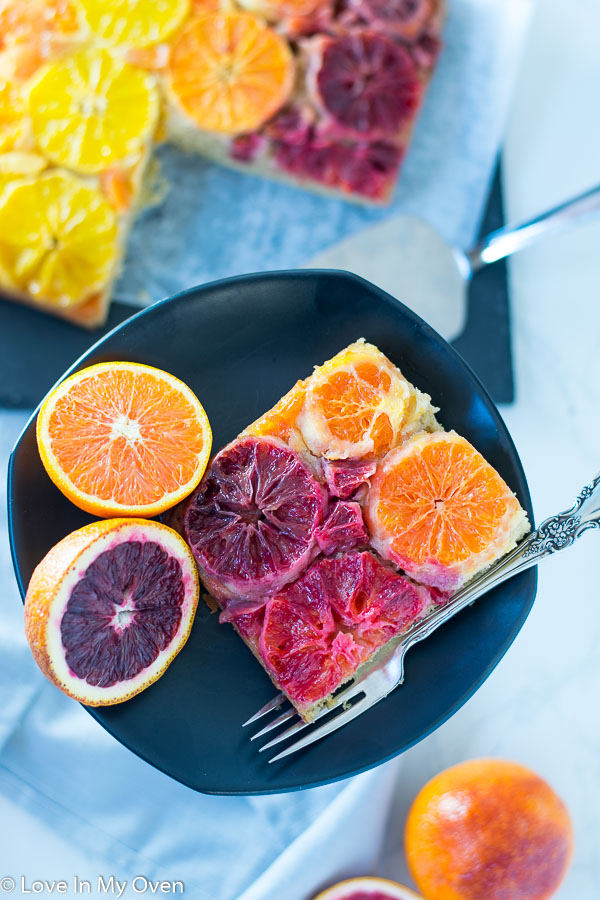
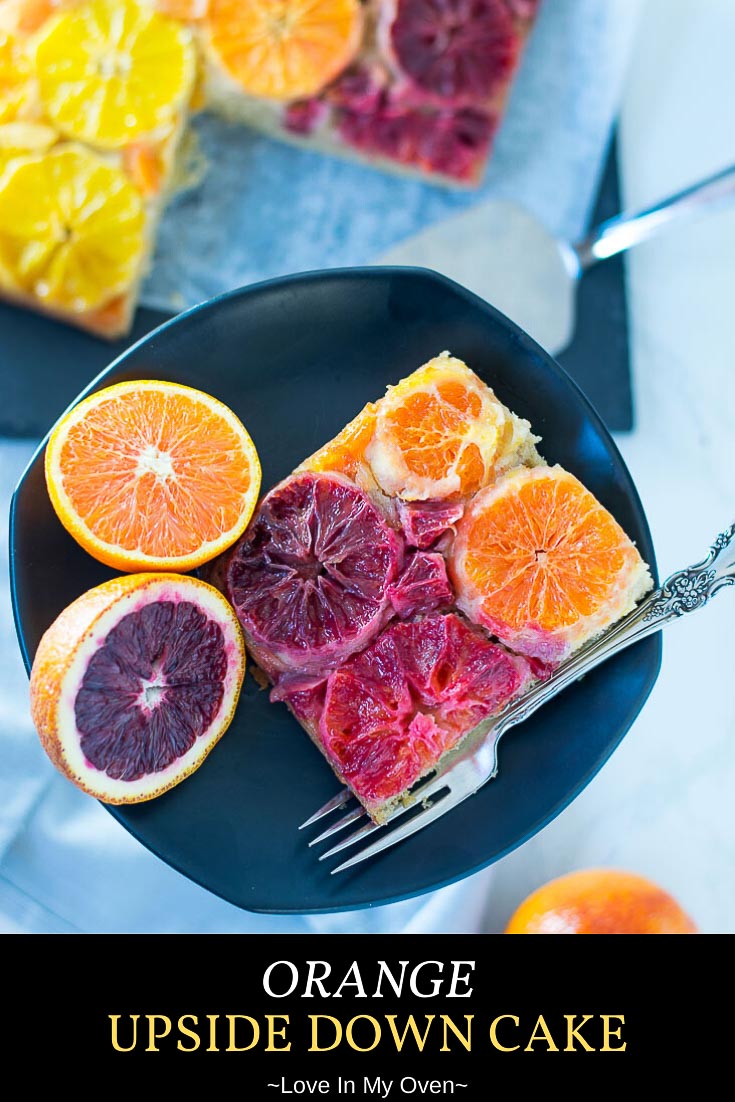
Impress your guests with this easy citrus cake! It’s an orange upside cake using 3 different oranges for 3 different colors! Celebrate citrus season with a citrus upside down cake.

I’m baaaack with MORE citrus! I know this glorious season of oranges, grapefruits and the other round, juicy, delicious fruits are coming to a close so I’m doing as much as I can with them while they’re still around and everyone moves on to chocolates for Valentine’s Day!
While I’m not a big New Year’s Resolution person, one thing I said to myself was that I need to eat more cake and chocolate (hah)! I know, kind of a backwards resolution right? But seriously, cake is one of my favourite things and I deprive myself of it too much. Life is short! Plus, baking and decorating cakes is just so fun.
So, while this orange upside down cake does all the decorating for itself, it’s still cake. OOOH is it ever!
The cake is moist and slightly dense, with a light citrus flavor. The oranges are covered in a sweet and sticky glaze. It’s so delicious!
What oranges do you use for this citrus upside down cake?
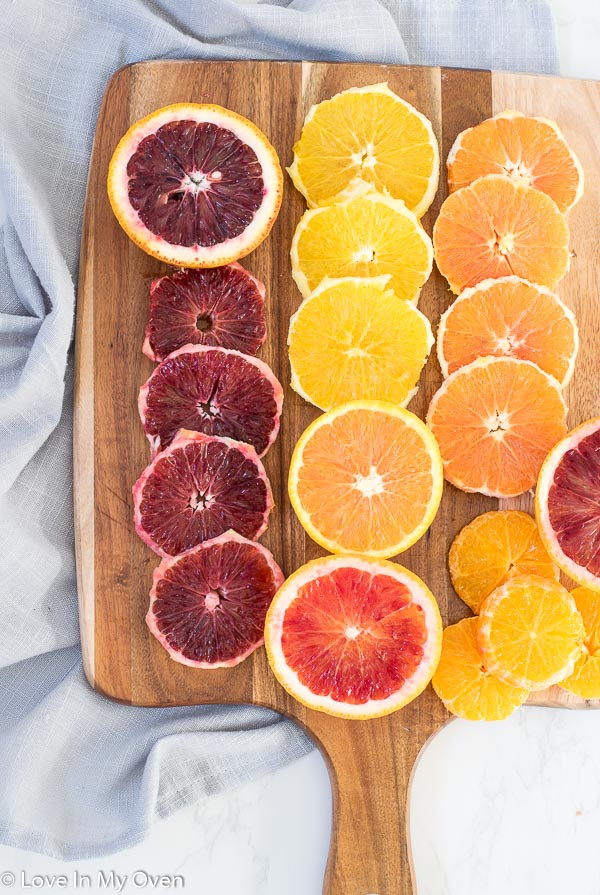
All of them! More specifically, the ones you want to use. You can use blood oranges, navel oranges, cara cara, or even mandarin! Use just one of those or all of the different types for a fun color scheme!
Do you have to use a rectangular pan for the cake?
For this recipe, I used my standard 8″x8″ baking pan, but you could definitely use a round 9″ cake pan as well. The bake time will be similar, but as always, be sure to check for readiness my using a toothpick inserted in the center of the cake! If it comes out clean, you know it’s done 🙂
Whether you use a round pan or a square pan, I would first put down a piece of parchment paper in the pan, with the edges overhanging the sides of the pan. It will make your life much easier when you go to flip the cake!
So, what if the oranges don’t fit perfectly in the pan?
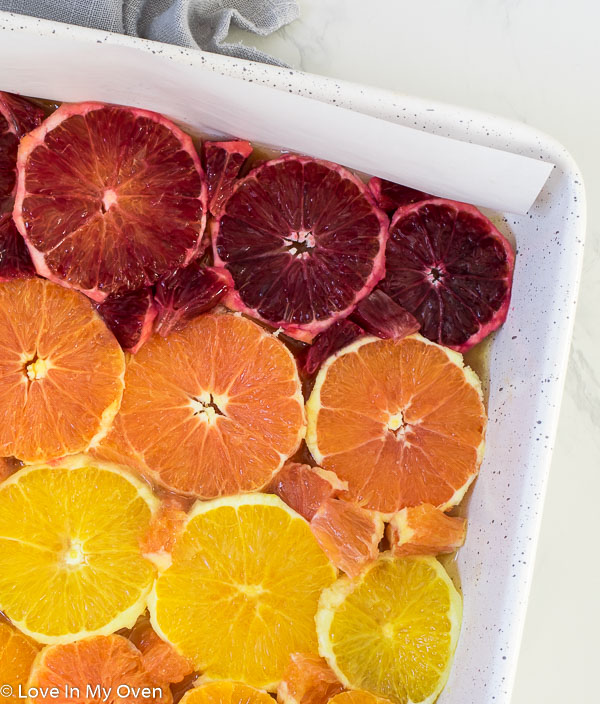
They won’t! How to get past this while still creating a beautiful cake is by inserting small pieces of the fruit into the gaps between the oranges. Once it’s all baked it looks terrific!
A tip for peeling and cutting the oranges:
After a few unsuccessful peeling and cutting attempts, I can highly recommend to you that you should slice the oranges into rounds BEFORE peeling them. This will ensure that the oranges remain firm while slicing, to create even cuts! Once the orange is peeled and sliced into 1/2″ rounds, I like to use a small paring knife to make little cuts around the edge of the orange before removing the peel! Try to remove as much of the white pith as possible, as this part tends to be a little bitter.
Can you store the cake at room temperature?
Yes! But only for 2-3 days, and then I would move the cake to the refrigerator, if it makes it that long! Be sure to store the cake in an airtight container.
Put some sunshine into your life with this orange upside down cake!
Some other citrusy recipes for you to enjoy!
Print
Orange Upside Down Cake
- Total Time: 1 hour
- Yield: 5-6 servings 1x
Description
Impress your guests with this easy citrus cake! It’s an orange upside cake using 3 different oranges for 3 different colors!
Ingredients
Glaze
- 3 tbsp unsalted butter, melted
- 3 tbsp brown sugar
Cake
- 3–4 oranges*, sliced into 1/2” slices, peel removed
- 1 1/2 cups all-purpose flour
- 1/2 tsp baking powder
- 1/2 tsp baking soda
- 1/4 tsp salt
- 1/3 cup unsalted butter, softened
- 1/2 cup brown sugar, packed
- 1/4 cup granulated white sugar
- 1 large egg
- 1 tsp pure vanilla extract
- 1/2 cup milk**
- 1/4 cup orange juice
Instructions
- Preheat the oven to 350 F and line an 8″x8″ standard baking pan with parchment paper, allowing the ends of the paper to overhang on the sides. Whisk together the melted butter with the brown sugar, and then pour this mixture all over the bottom of the prepared pan.
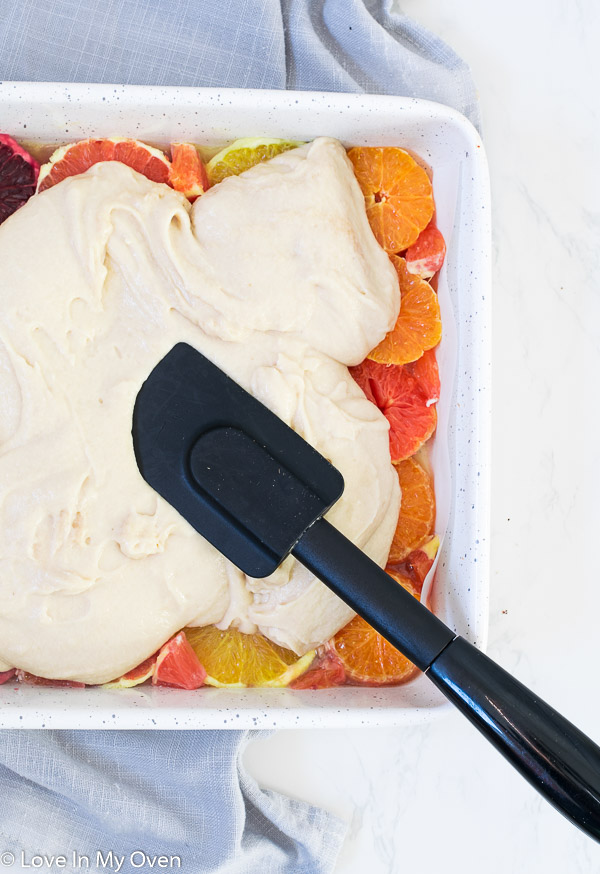
- Place the peeled orange slices, side by side, into the bottom of the pan, on top of the glaze. Fill in all of the gaps with small pieces of orange (see blog post above for photos and directions).
- In a large mixing bowl, whisk together the flour, baking powder, baking soda and salt. Set aside. In the bowl of a stand mixer fitted with the paddle attachment, or using a handheld electric mixer, beat the softened butter with both sugars, on medium-high, until light and fluffy, about 1 minute. Add the egg and vanilla and mix again. Add half of the dry ingredients, and mix together on low, slowly, for about 30 seconds. Add the milk, and the remaining dry ingredients, and mix again on low for 15-20 seconds. Add the orange juice, and mix again, on low until all ingredients are incorporated. Pour the cake batter on top of the pan with the prepared oranges, spreading it with a spatula to make it even. Place the pan in the preheated oven, and bake for 40-45 minutes. Check the cake after 40 minutes by inserting a toothpick in the center; if the toothpick comes out clean, the cake is done. If there is batter on the stick, bake for another 5 minutes. Remove the cake, and allow it to cool for 10-15 minutes before inverting the cake on to a cake stand or plate.***
- Allow the cake to cool completely, before slicing and serving. Enjoy!
The cake can be stored in an airtight container at room temperature, for 2-3 days, or 4-5 days in the fridge. I would not recommend freezing the prepared cake.
Notes
*Use whatever oranges you like; the amount you need will vary on the size of the orange, but you’ll need 3-4. I used a mixture of blood oranges, cara cara, medium navel and mandarin. See the above blog post for tips on slicing and peeling the oranges.
**You can use dairy milk or non-dairy (almond, coconut)
***If the top of the cake is uneven, and rounded, use a serrated knife to even out the cake a bit before inverting it.
- Prep Time: 20 minutes
- Cook Time: 40 minutes
- Category: cakes
- Method: baking


I love a cake with benefits! I feel less guilty about splurging when I’m getting my C’s as well.😄This looks so pretty and so delicious too!!
Definitely!! It’s basically like a vitamin cake, right!? Thank you Thao!!
Absolutely a gorgeous treat and so moist. Brown sugar works so well with oranges, love this recipe.
Brown sugar does go well with oranges!! Thank you Milena!
Could you put this (and your other recipe’s) into grams and millilitres please for the rest of the world to follow please? It’s so much easier as it’s a nightmare trying to go to conversion sites for all the different ingredient equivalent’s.
Any recommendations on reducing the sugar and keeping the consistency of the cake? Would love to make it a little less sweet. Thanks!
Mine looked nothing like the photos; the oranges looked separated and the glaze didn’t really sit on the cake. The blood oranges were a little bitter- if I make it again I will use all navels or cuties. I thought the blood oranges would be pretty. Also the oranges were hard to cut into- they came off all in one piece, so I’m not sure what I did wrong there. I will definitely try this recipe again to try to improve it. I think I will increase the amount of glaze and. slice the oranges a little thinner.