This post may contain affiliate links. Please read our disclosure policy.
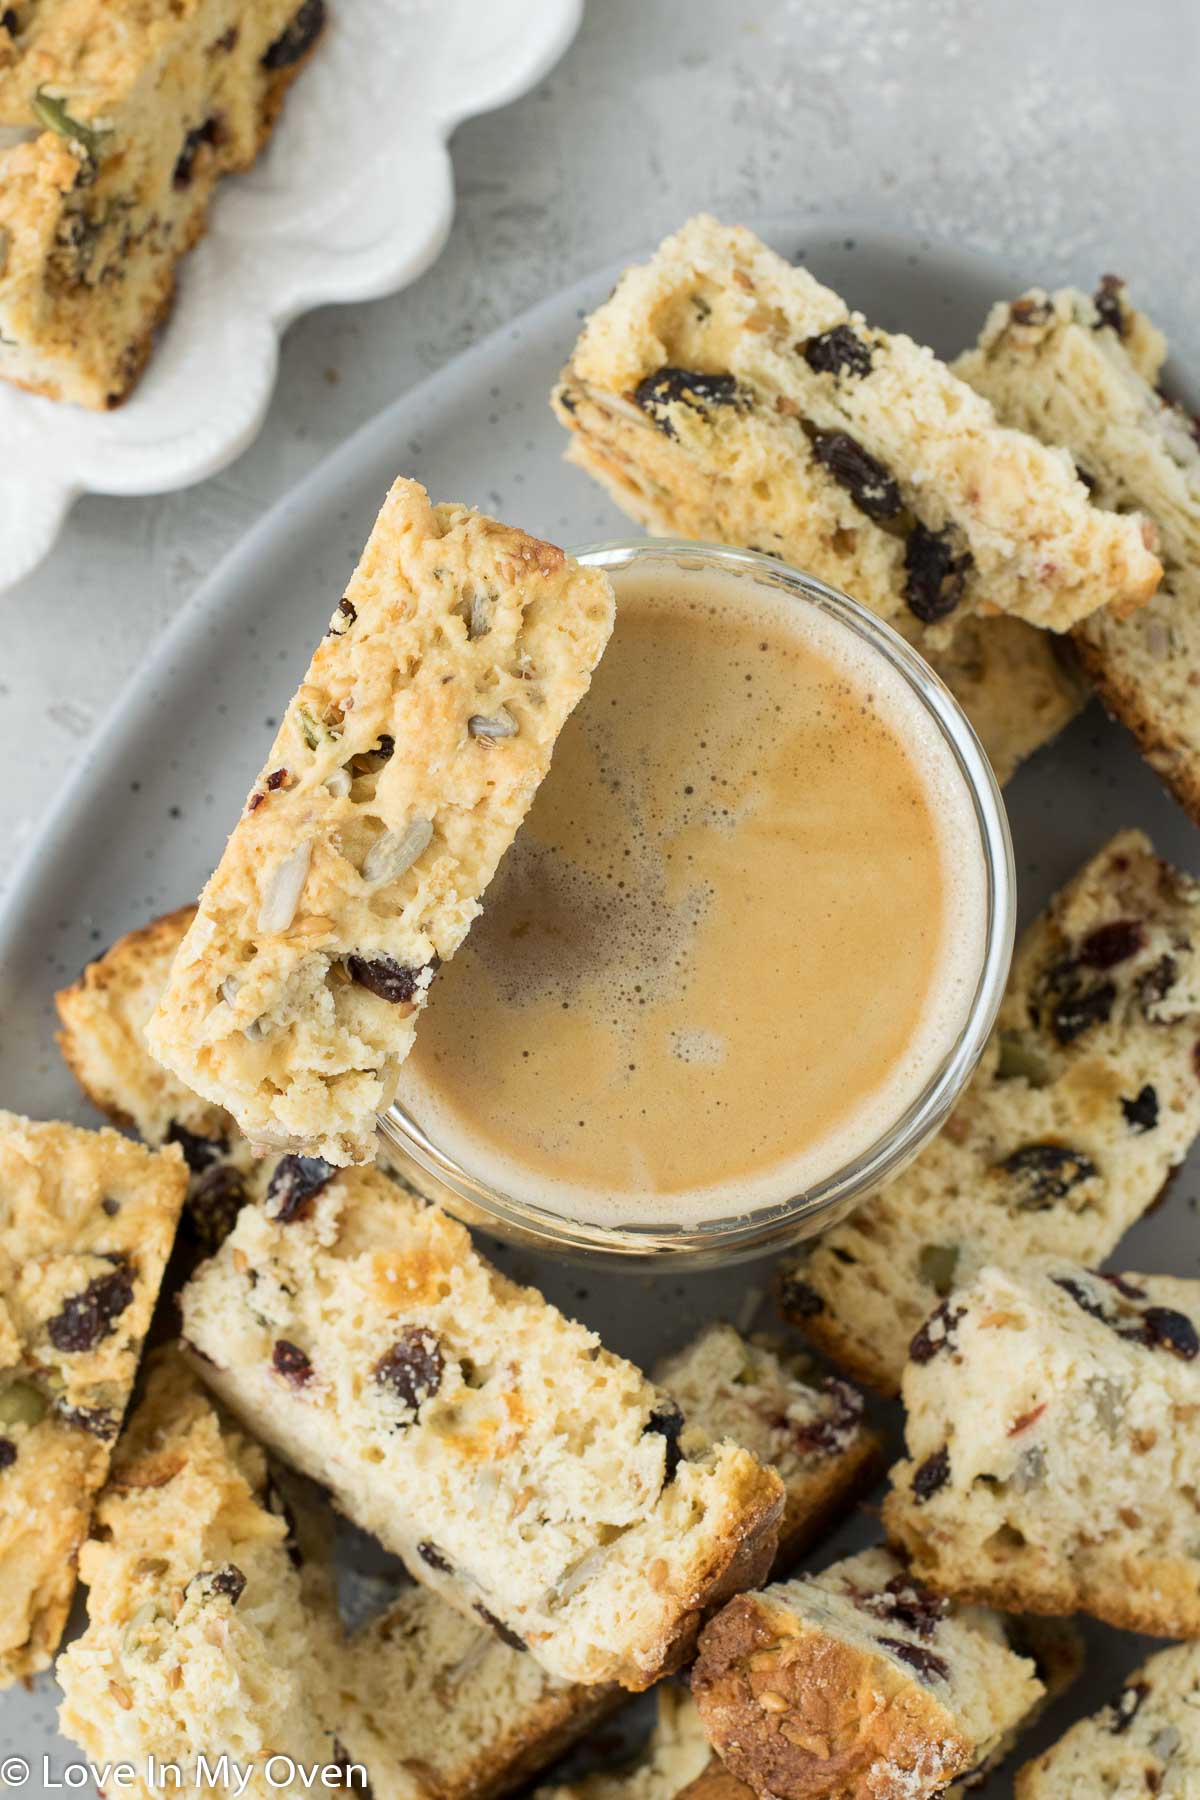
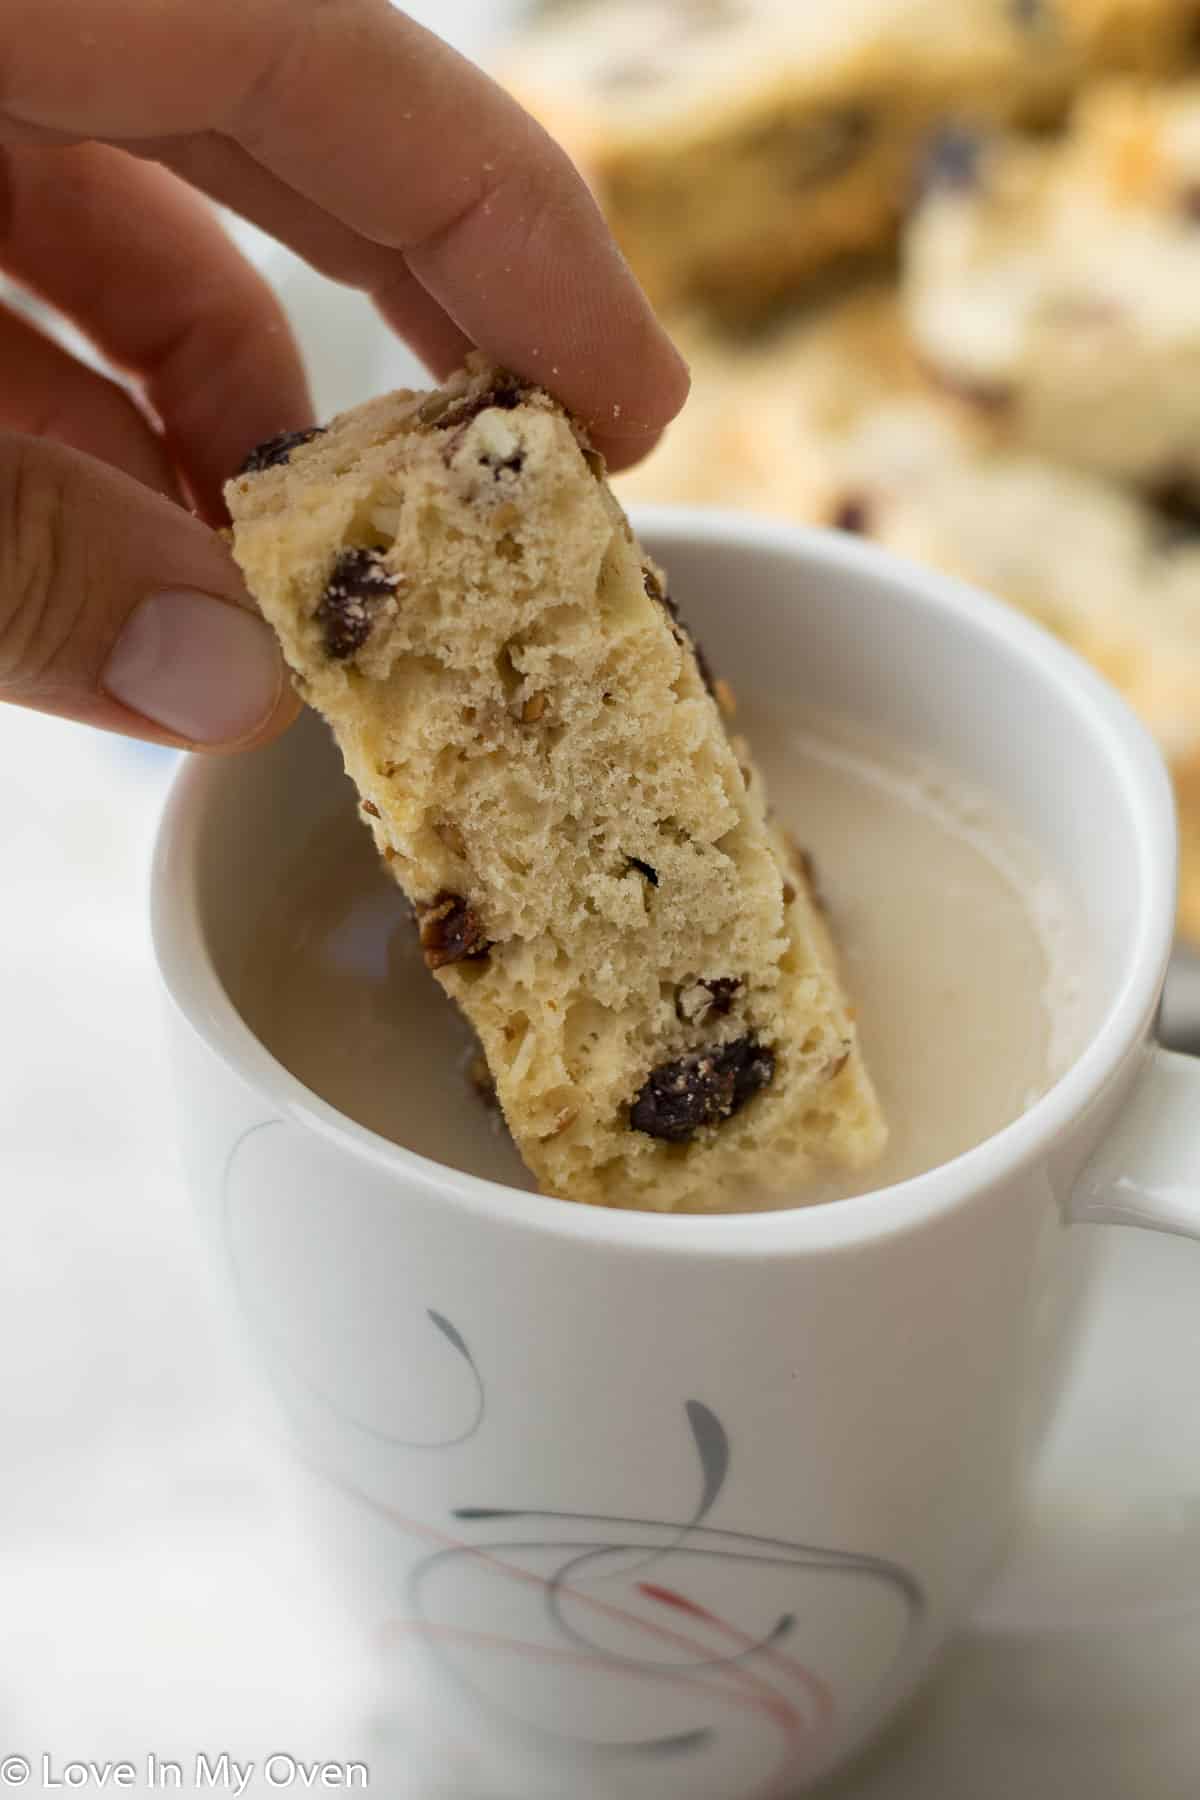
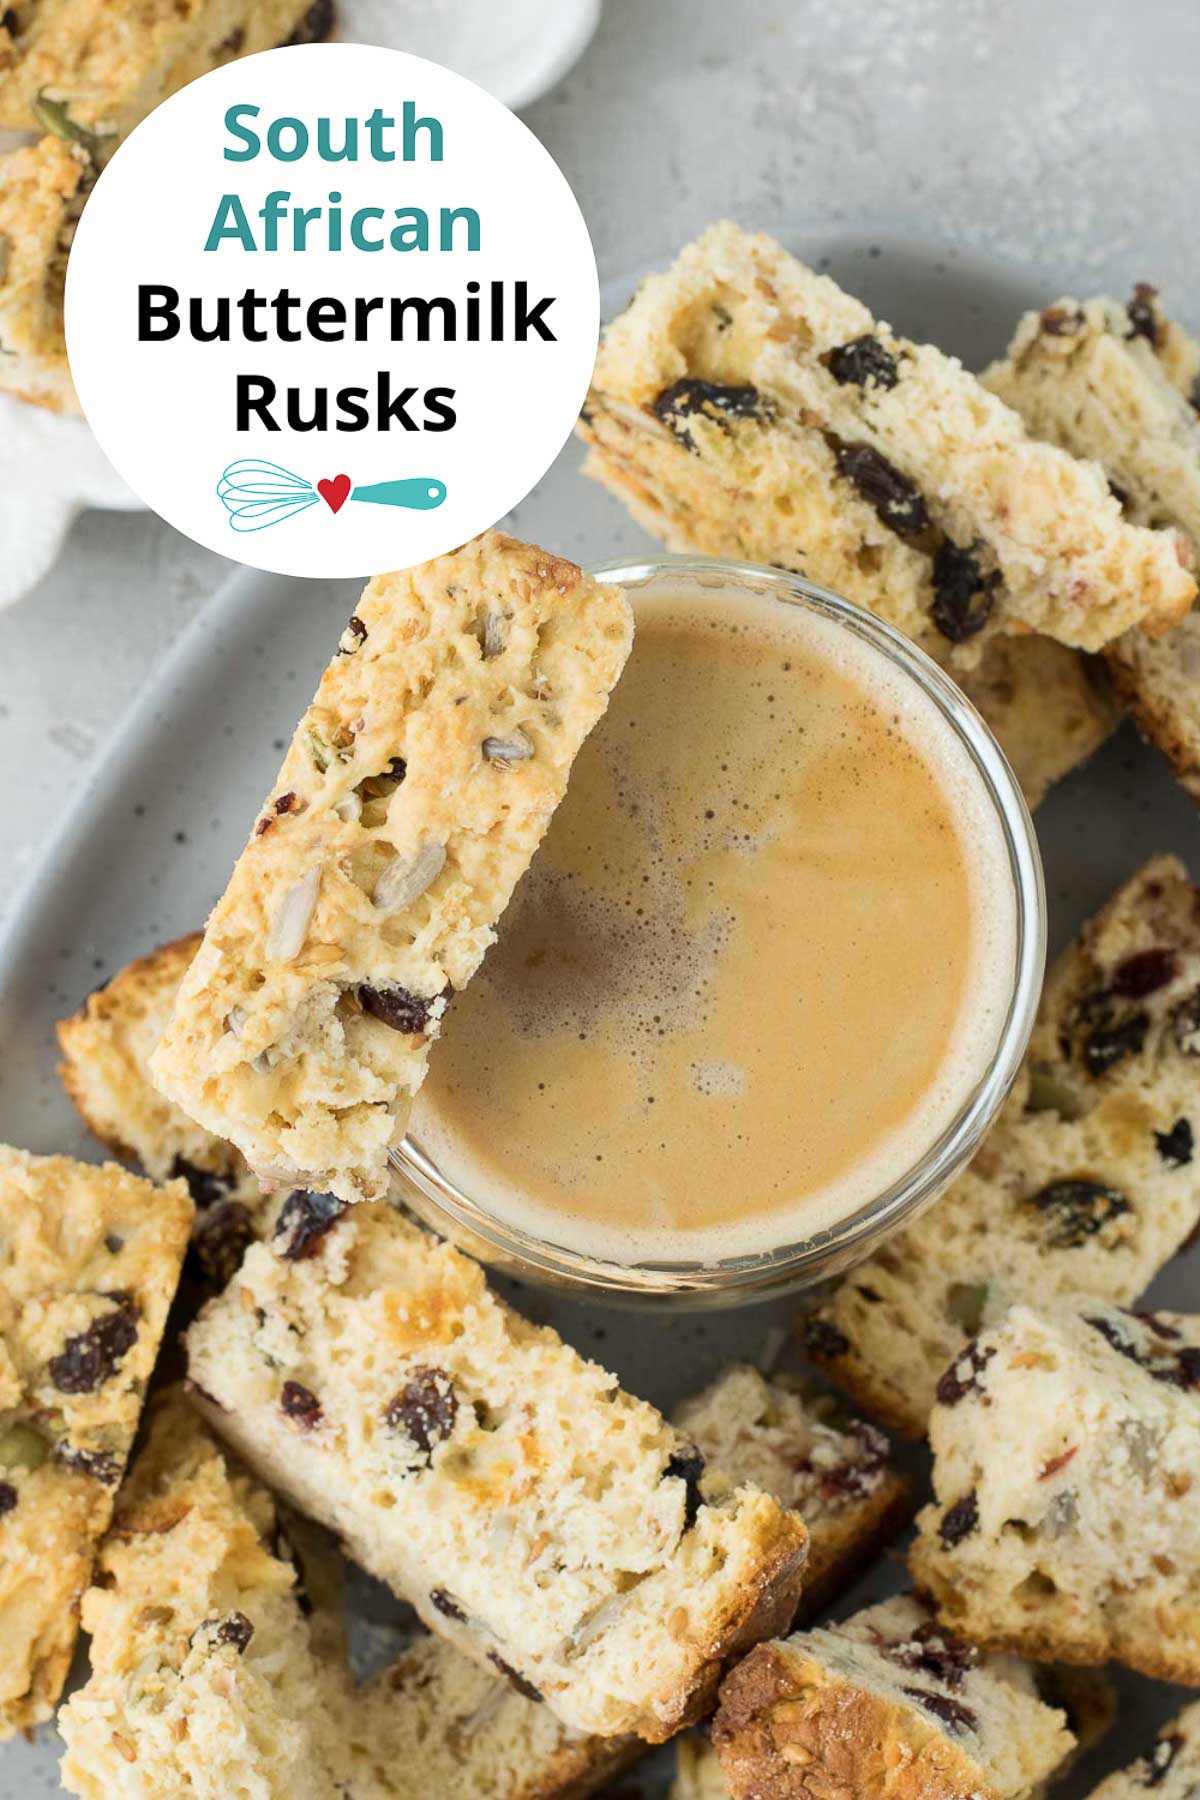
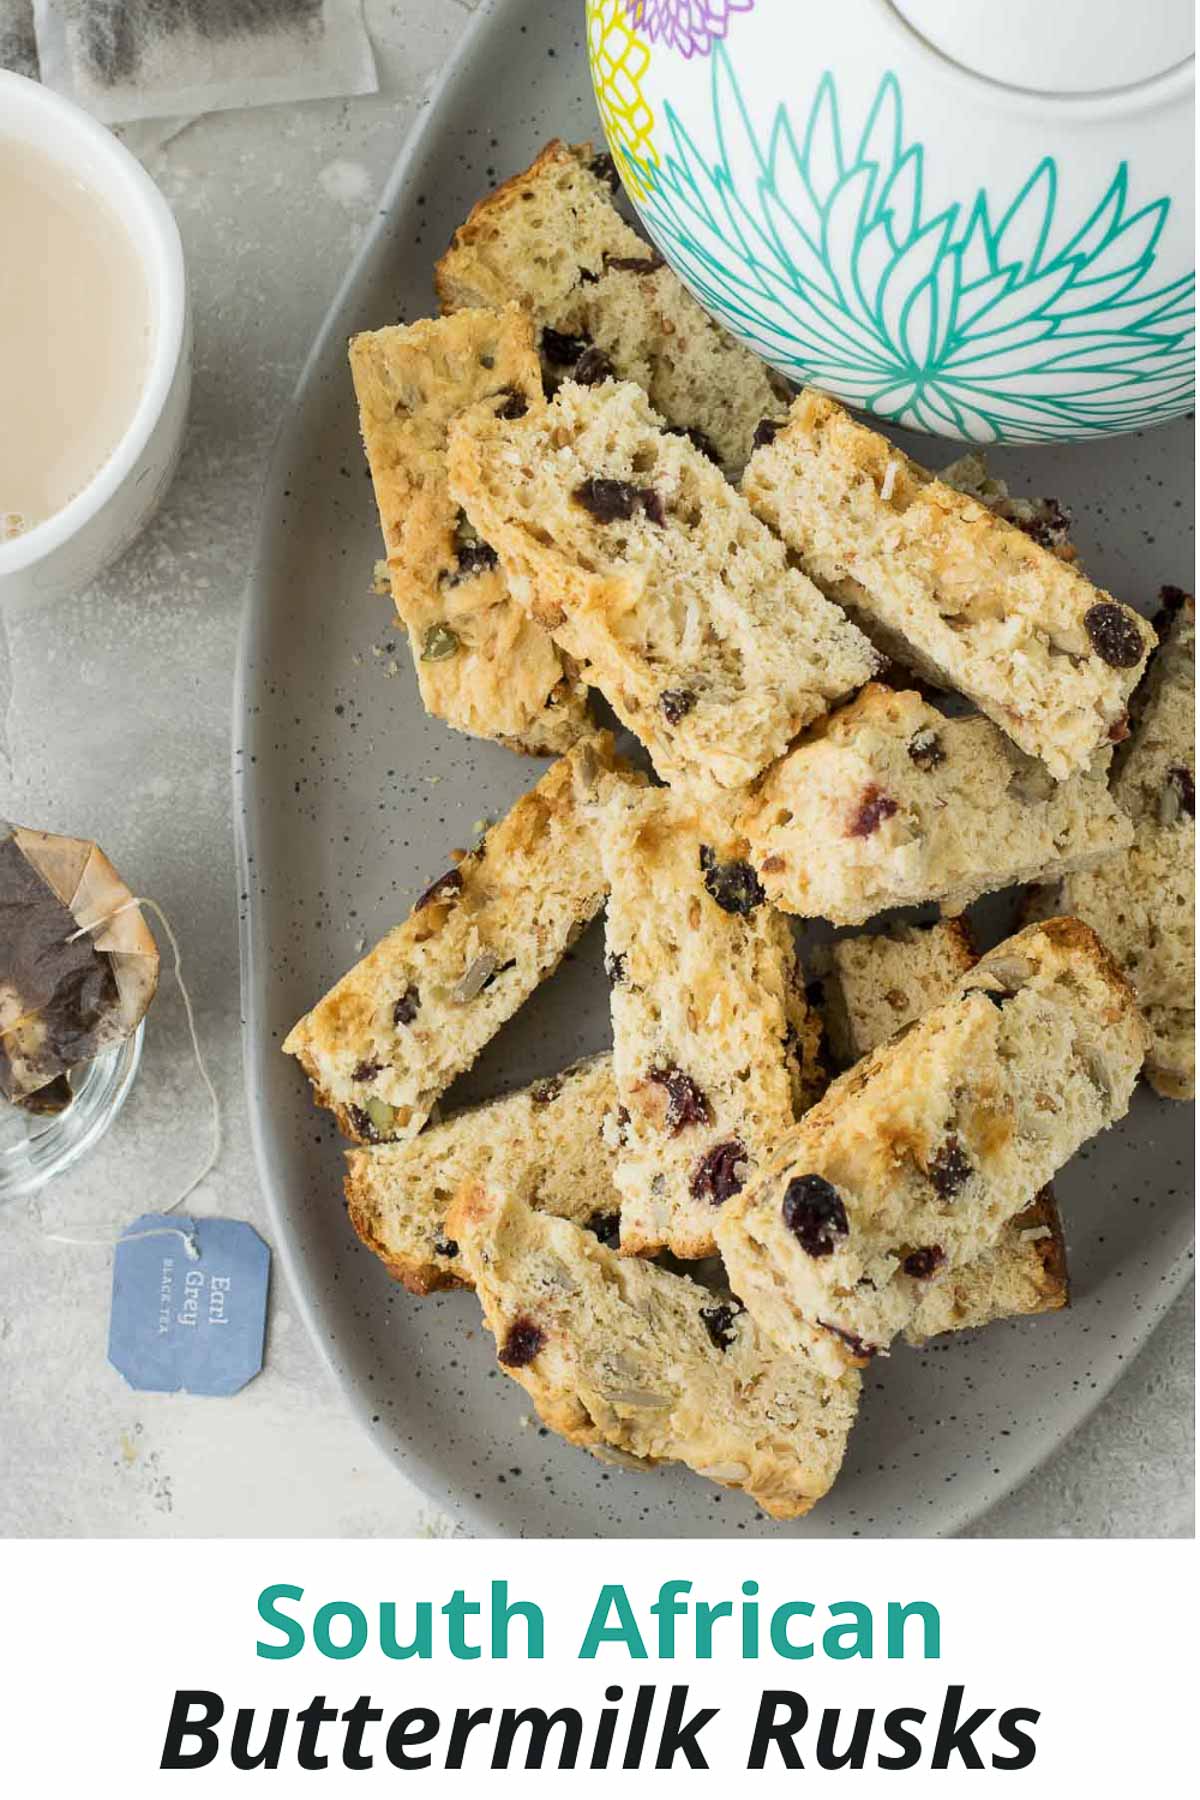
These buttermilk South African rusks are a super easy recipe with customizable options! If you love dipping buttermilk rusks into your coffee but just want to make your own, look no further!
For many of my usual readers, it won’t be any surprise to know that I’m married to a South African and I enjoy dabbling in South African cuisine from time to time. Buttermilk rusks have been one of those things that I kept meaning to perfect but never got around to, until now.
Unfortunately for my husband, they’re not an easy thing to find in a grocery store here in Canada, although if you were in South Africa they’d be everywhere! Luckily for him, I’ve landed on this winning recipe and they’ll be on looking back!
What is a South African rusk?
Rusks are very similar to biscotti in that they are also a “twice-baked cookie”; however, the second baking with a rusk is more of a dehydrating process, baking very low and slow for a good 5-6 hours.
The cookie itself is often much more rustic looking as you can see from the photos. Biscotti tend to be long and narrow and formed into a long loaf type of shape. Rusks are cut much less precise and the shape can be however you choose. They’re often thicker and shorter.
In short, rusks are perfect for dunking!
What ingredients do you need for South African buttermilk rusks?
This recipe is very simple, with a long ingredient list! If you don’t have any of the seeds or dried fruits that my recipe calls for (or you aren’t a fan of them) you can easily substitute some of the ingredients for others that suit you better, or double up on some!
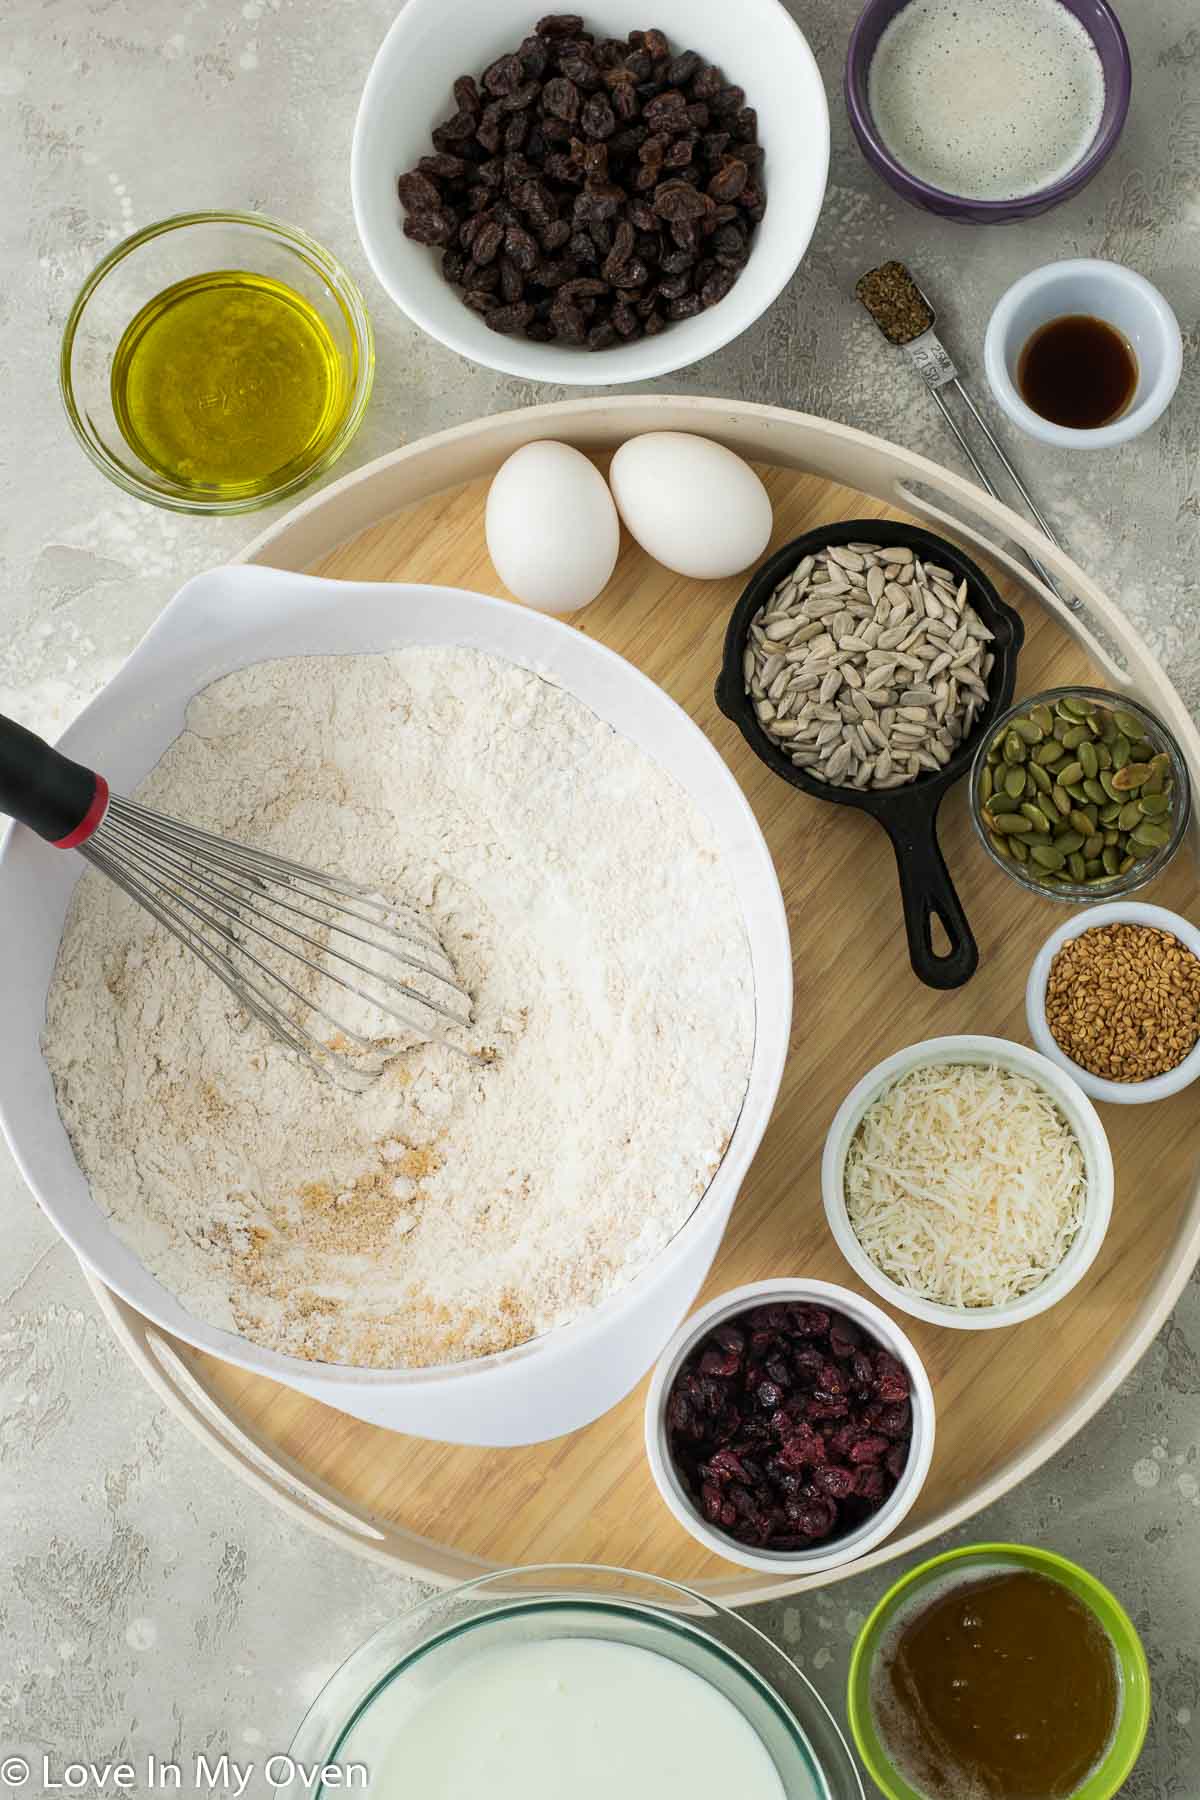
Ingredient List:
- all-purpose flour
- baking powder
- salt
- brown sugar
- anise seed
- raisins
- sunflower seeds
- shredded coconut
- flaxseeds
- pumpkin seeds
- craisins
- melted butter
- honey
- eggs
- oil
- buttermilk
- vanilla
How do you make buttermilk rusks?
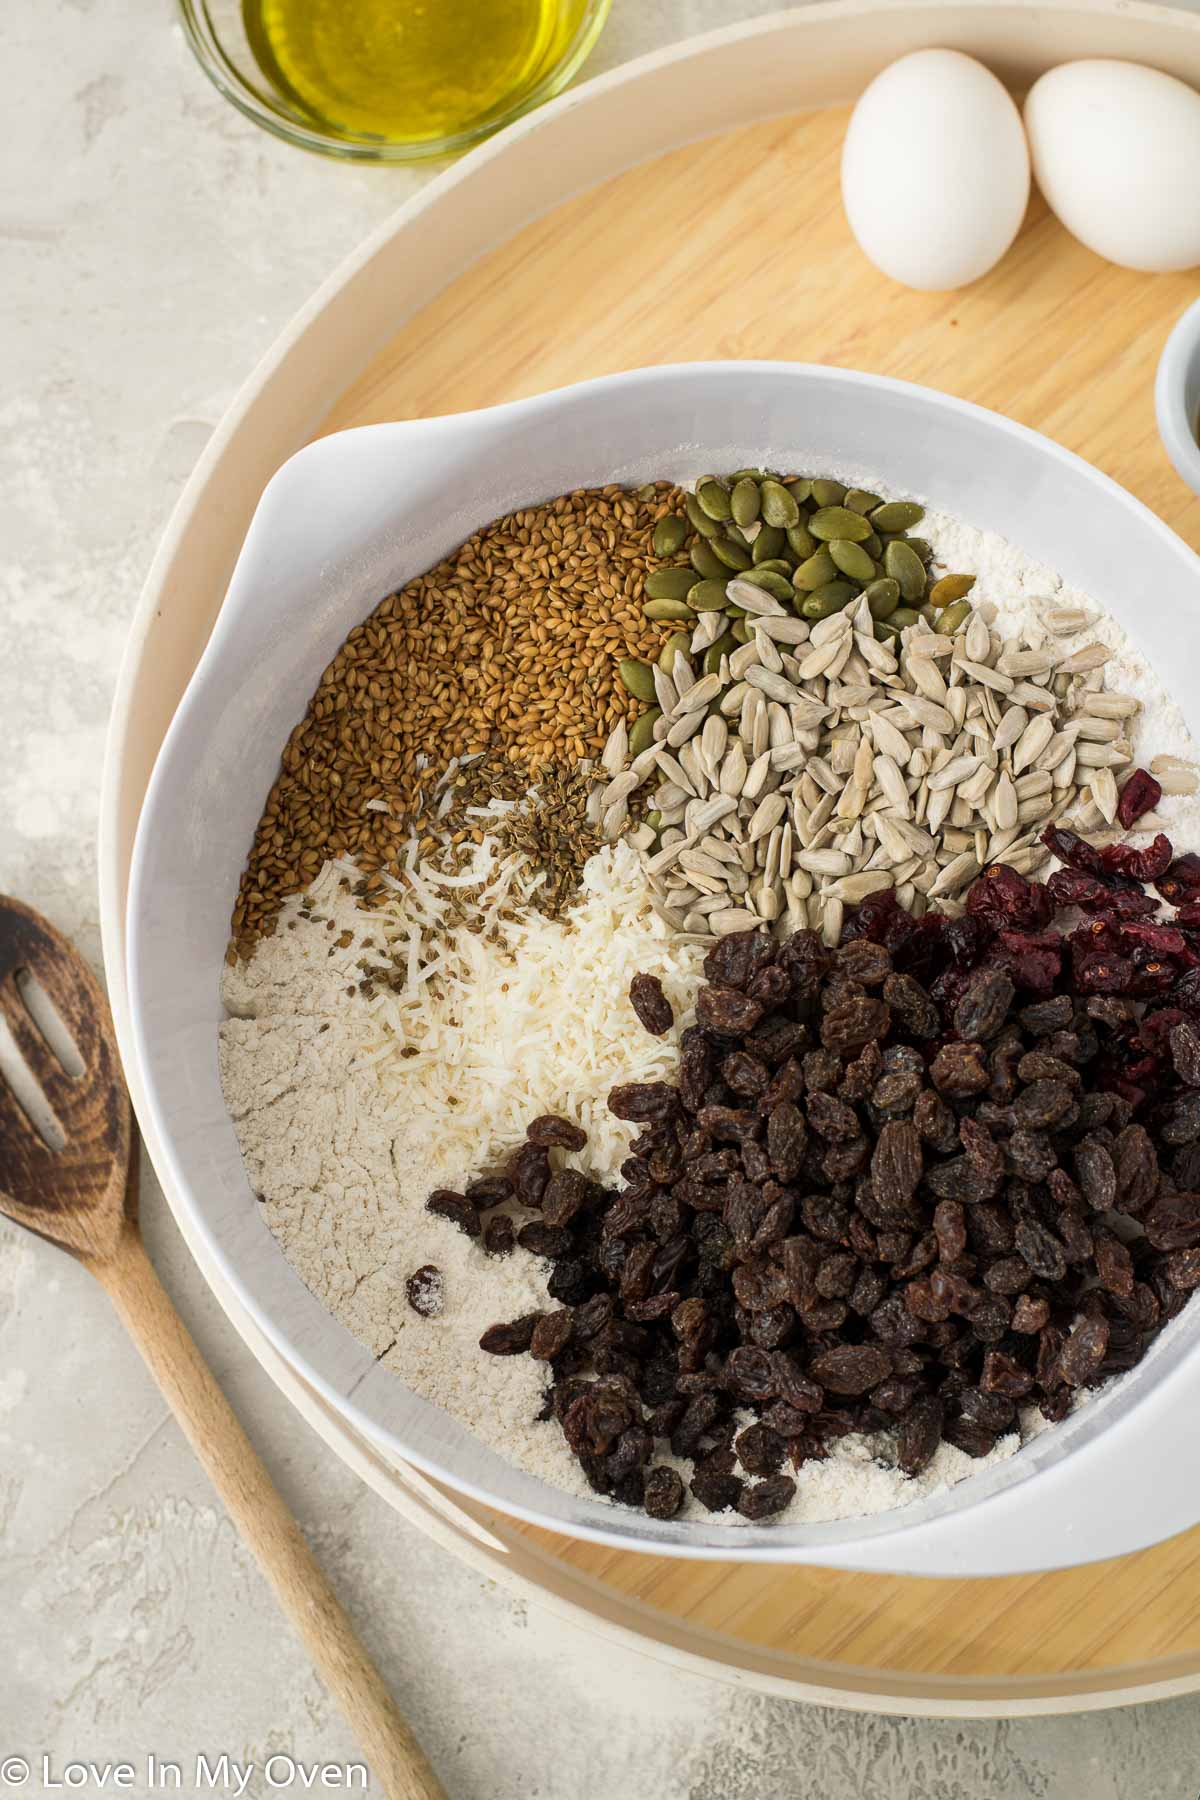
1. Start by whisking together the flour, baking powder, salt, brown sugar and anise in a large bowl. Add in the raisins, craisins, sunflower seeds, shredded coconut, flaxseeds and pumpkin seeds. Stir to combine.
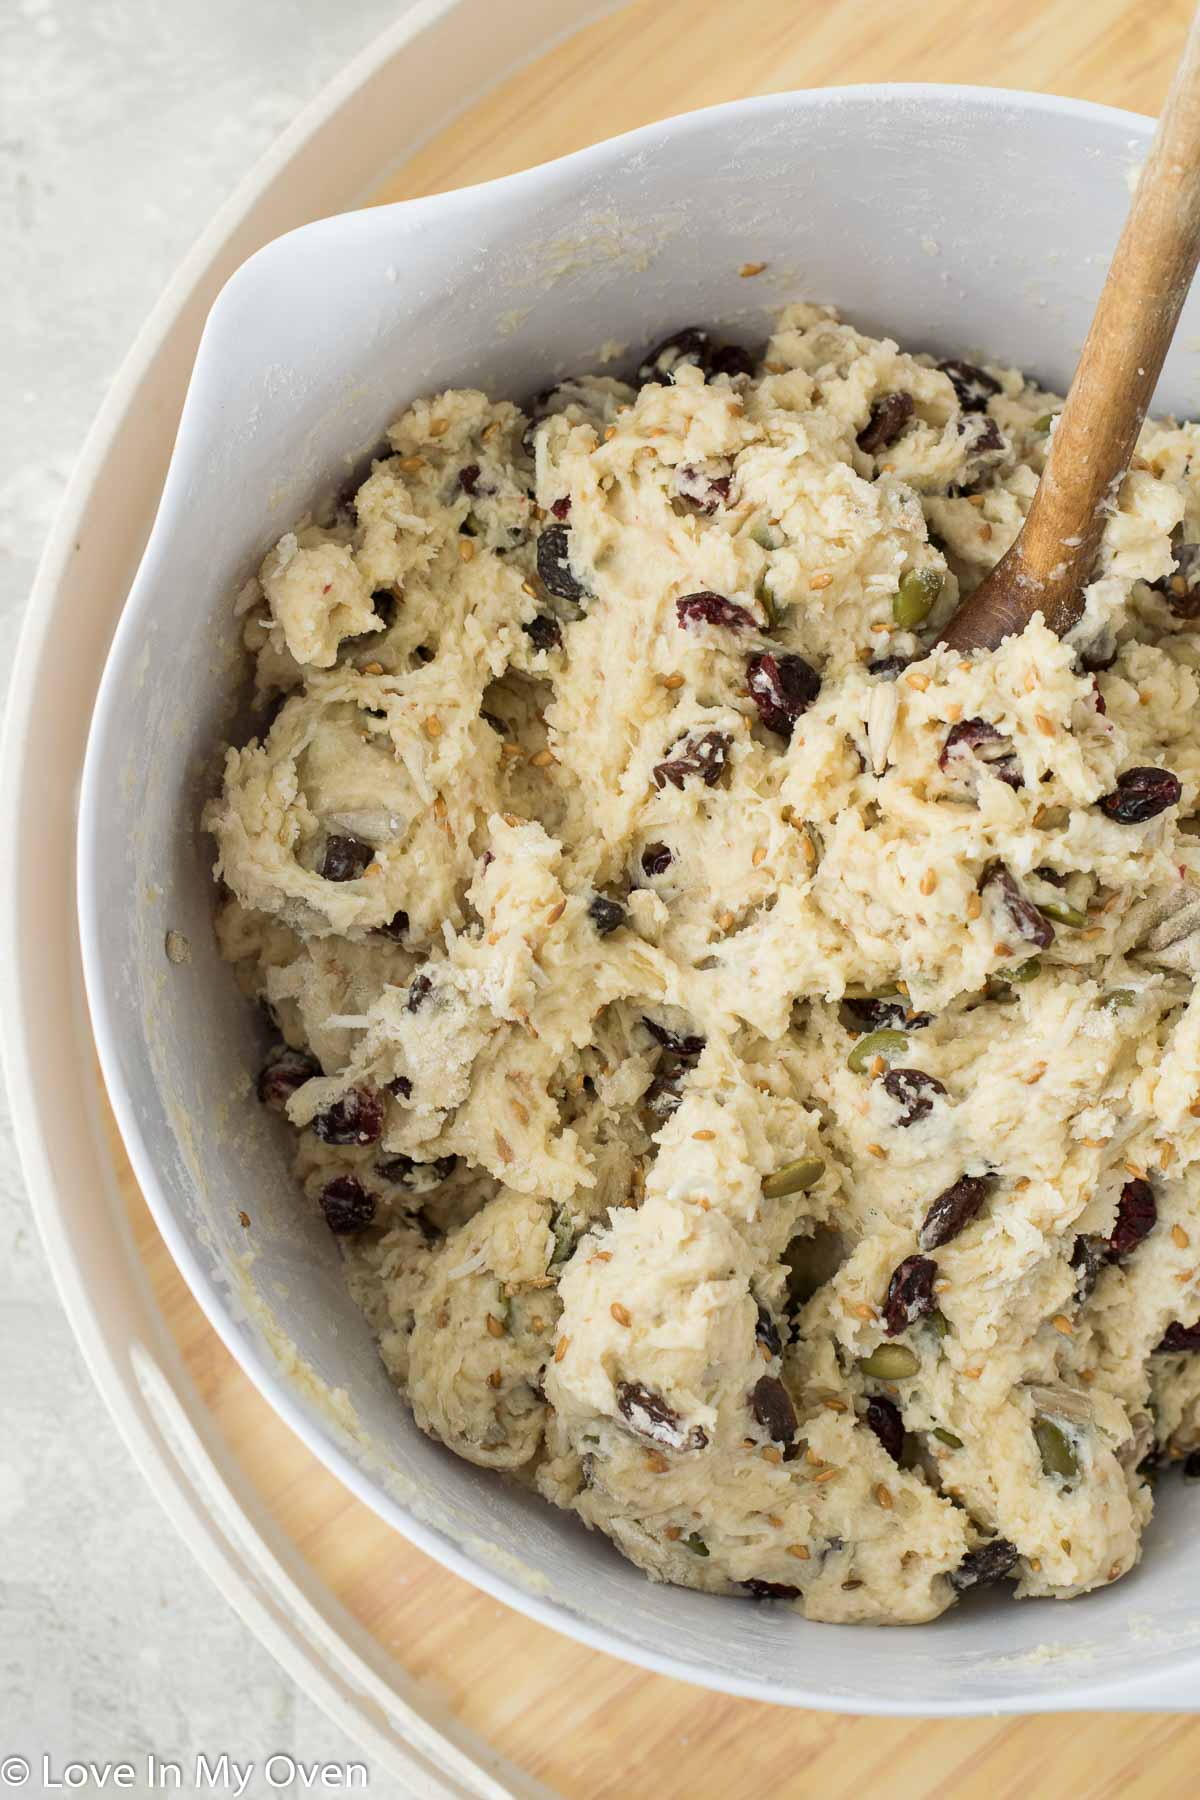
2. In a separate bowl, whisk together the honey with the eggs, then add the melted butter (ensure the butter is not too hot or it’ll cook the eggs). Add the oil, buttermilk and then vanilla. Whisk until completely smooth.
3. Slowly add the wet ingredients to the prepared dry ingredients. Stir with a large wooden spoon! The dough will be thick and sticky, but you should not have any remaining dry flour streaks once you’ve combined it all together. The rusks are meant to be dense, so there’s no worry about stirring too much.
If the dough seems too dry, add a small amount of extra buttermilk until there is no remaining dry flour.
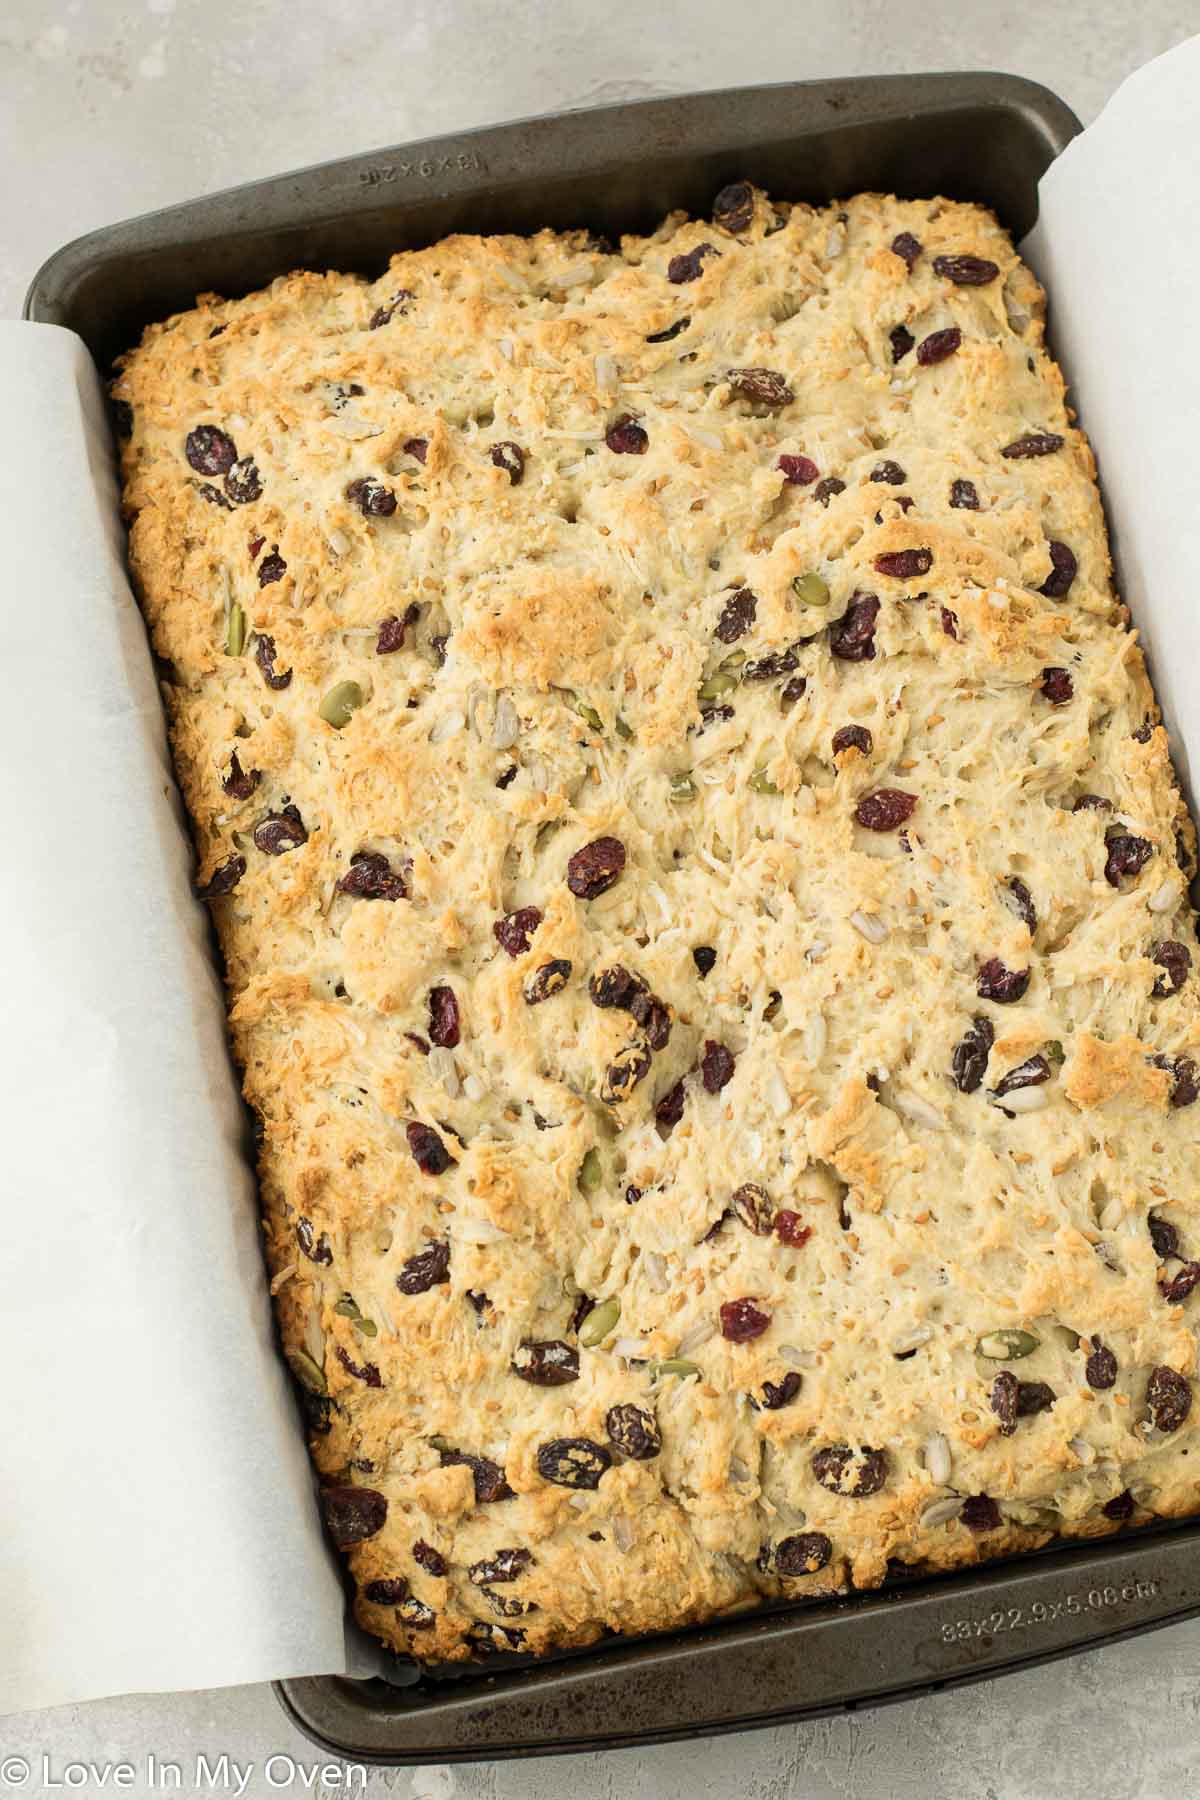
4. Empty the dough into a parchment-lined baking pan. I always use a 9×13 deep rectangular pan. Smooth out the top as best as you can, and then place the pan into the oven at 350 F for about 40 minutes or until the edges are only slightly browned.
5. Remove the pan from the oven to cool completely, about an hour. Then use the sides of the parchment to lift the rusks out of the pan and on to a cutting board. Use a sharp knife to cut into smaller pieces. It does not have to be precise. I usually get about 24-25 pieces but sometimes I’ll make them smaller!
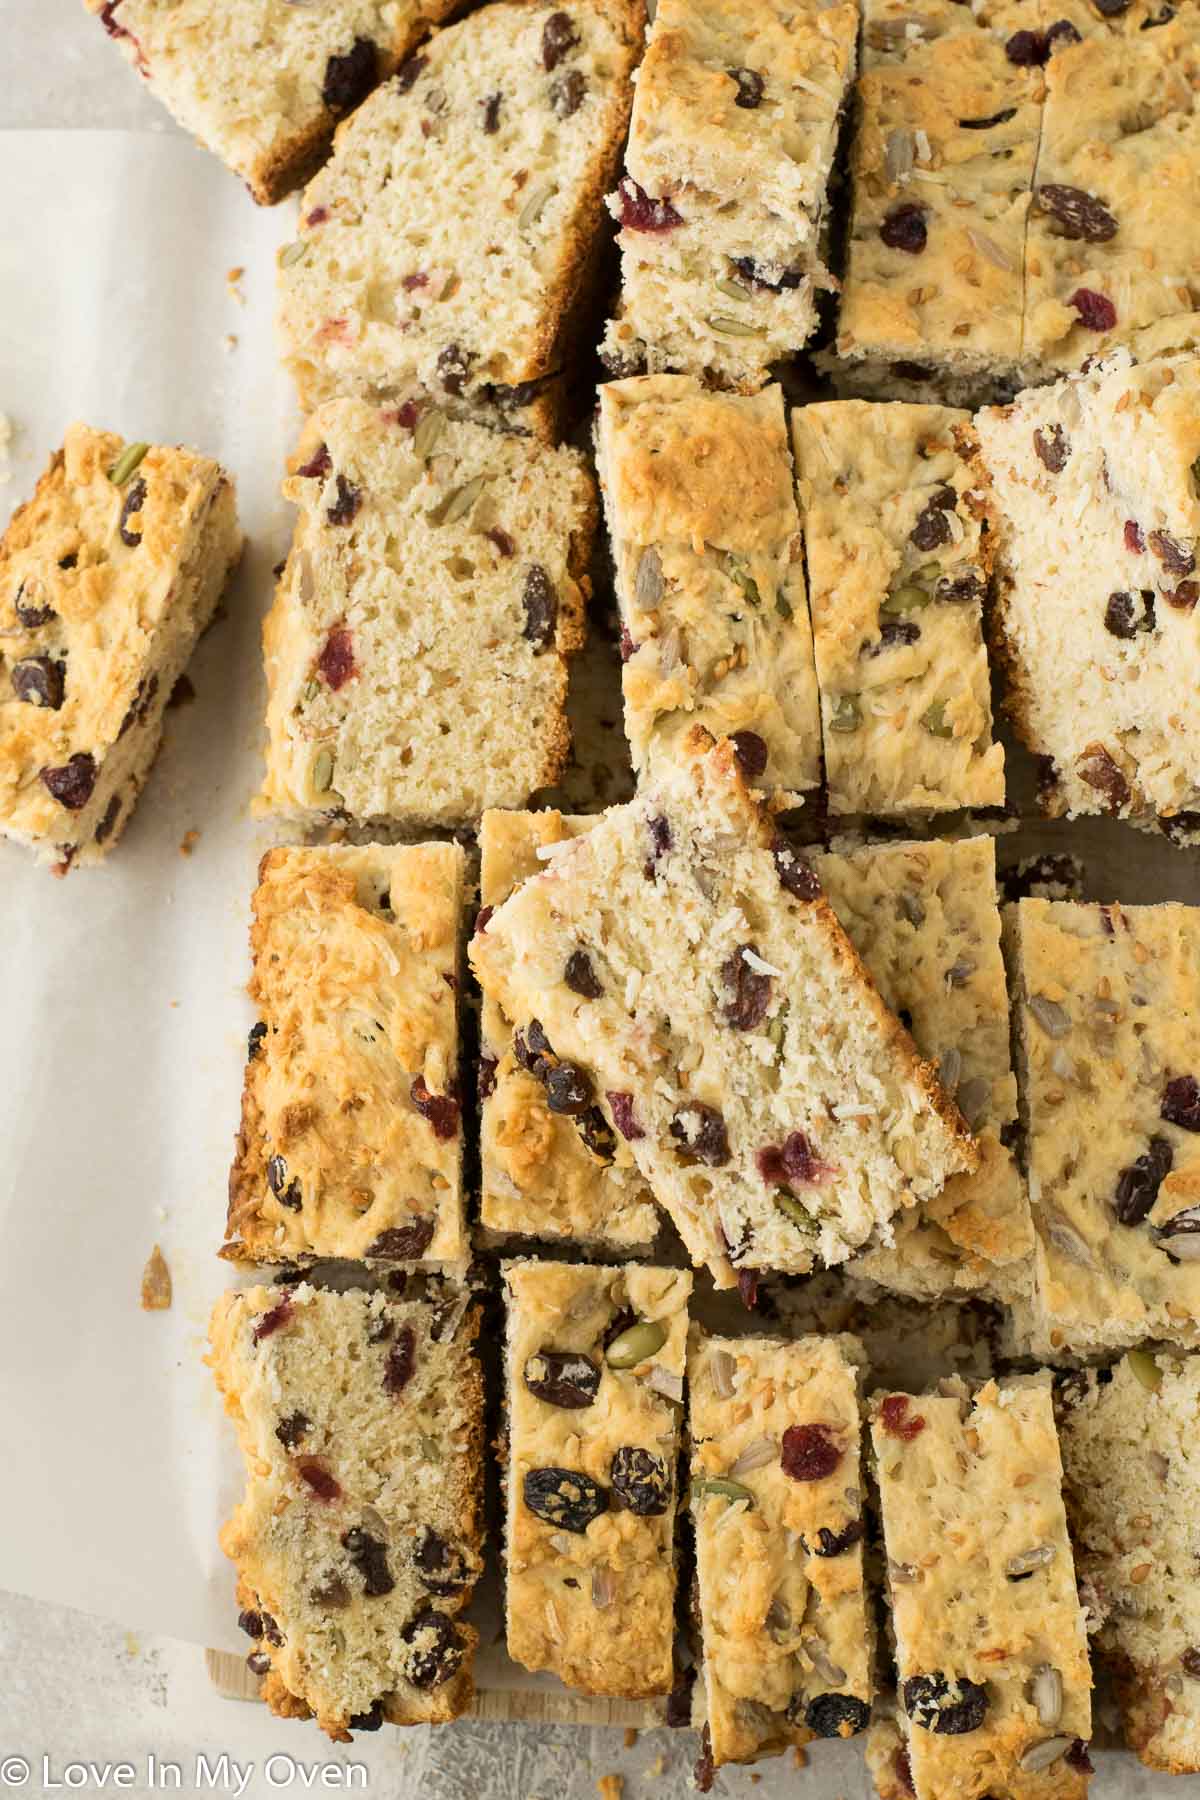

6. Lay the cut rusks on their side on another parchment-lined baking sheet. I usually just use the same parchment I had used in the first bake. Don’t worry about the rusks touching one another.
7. Turn the oven temperature way down to 175 F and then place the baking sheet inside. Keep the rusks inside for 5-6 hours or until completely dried. Once completely dry, let the rusks cool down and then store them in an airtight container.
How long do these buttermilk rusks last?
Since the cookies are already meant to be hard and dry, you can safely store the rusks in a container at room temperature for a few weeks. They’d likely be fine even longer than that, but ours haven’t lasted long enough to tell!
The rusks are also perfectly freezer-friendly! You can freeze them for up to 3 months in an airtight container. Just take them out of the freezer to thaw overnight on the counter before enjoying.
Do you have to use buttermilk for this recipe?
Buttermilk adds a great flavor to the recipe and also assists with the rise of the rusks during the first bake. If you don’t have buttermilk on hand, you can easily make your own by combining 1 3/4 cups milk with 1 1/2 tbsp of either lemon juice or vinegar. Stir to combine and let the milk sit for 10 minutes before using in the recipe.
Can you use a different shaped pan for this recipe?
If you don’t have a 9x13x2 pan you can also use a round 8 x 8 pan. If you use a larger pan than this, reduce the bake time to 35 minutes or until the edges are lightly browned.
What do you serve South African rusks with?
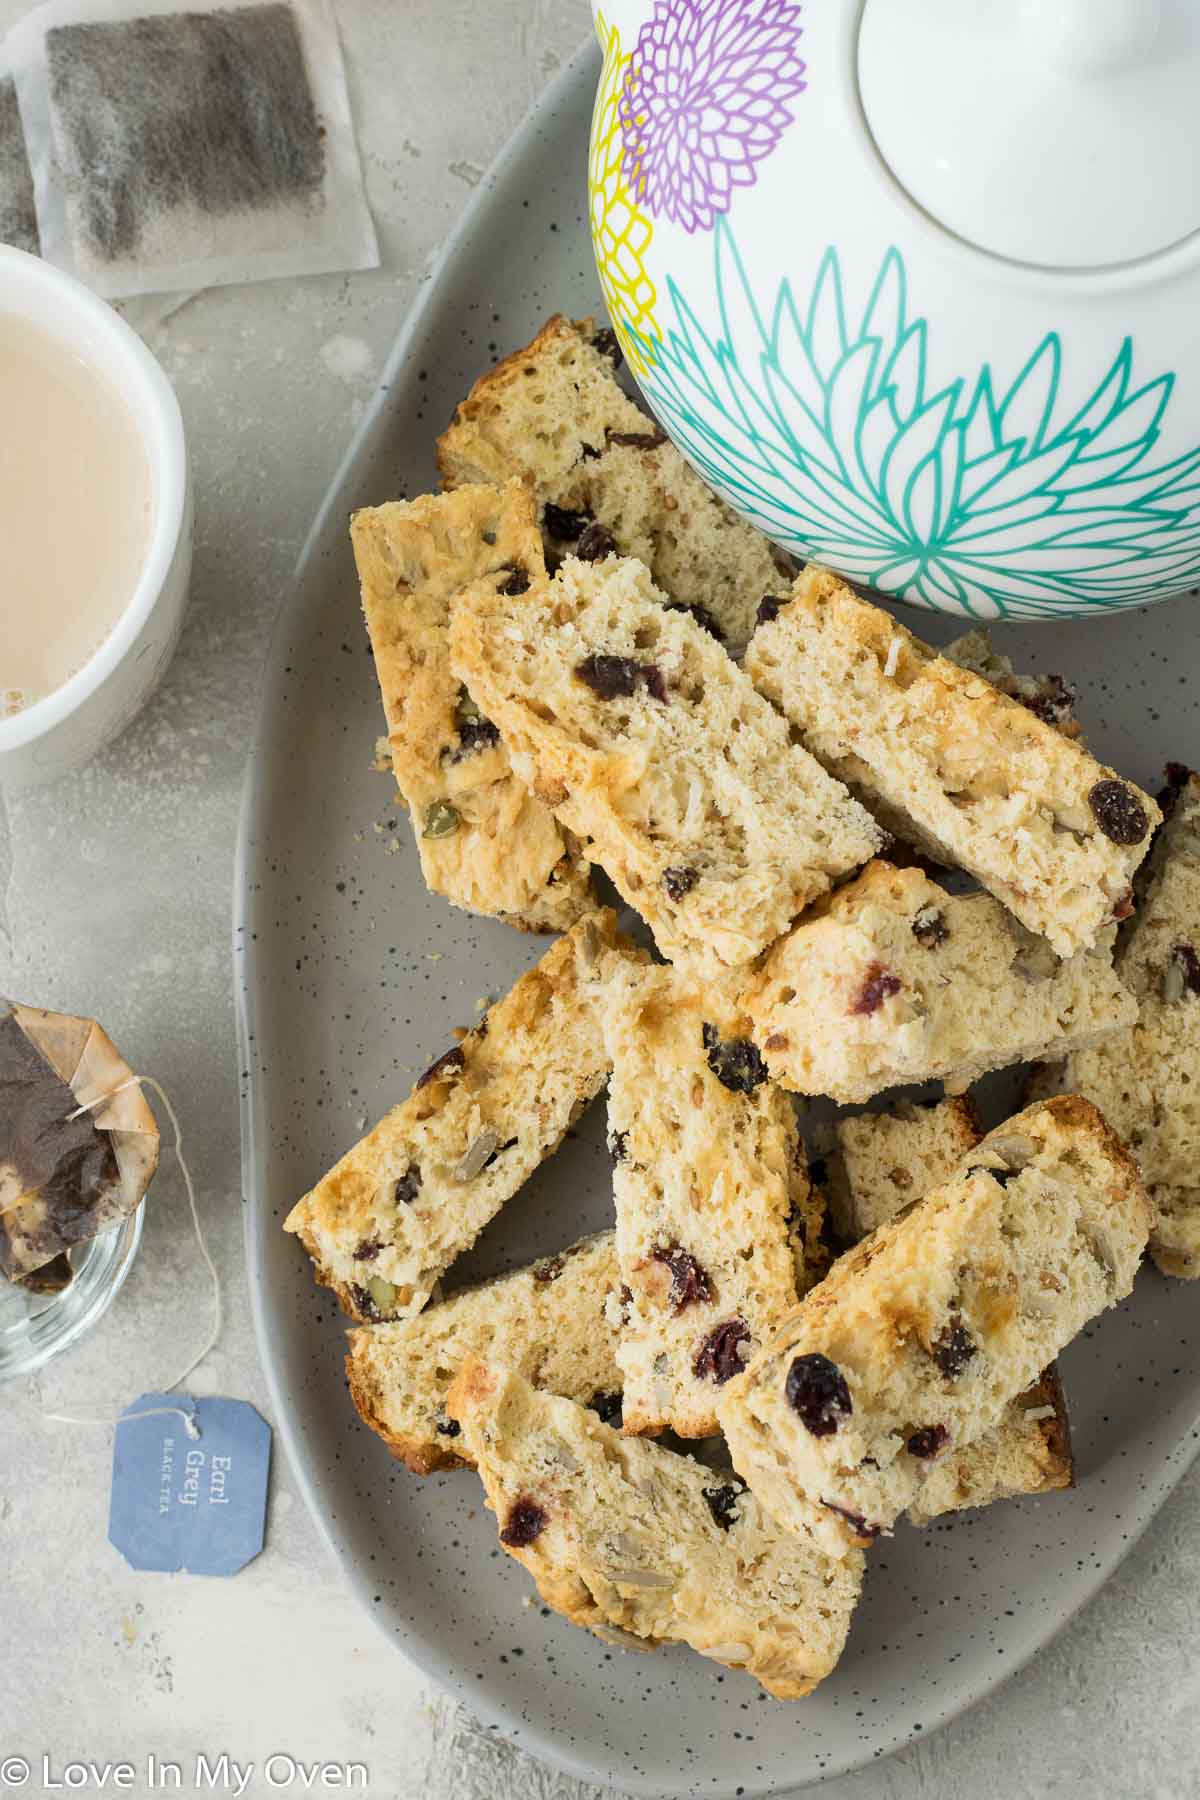
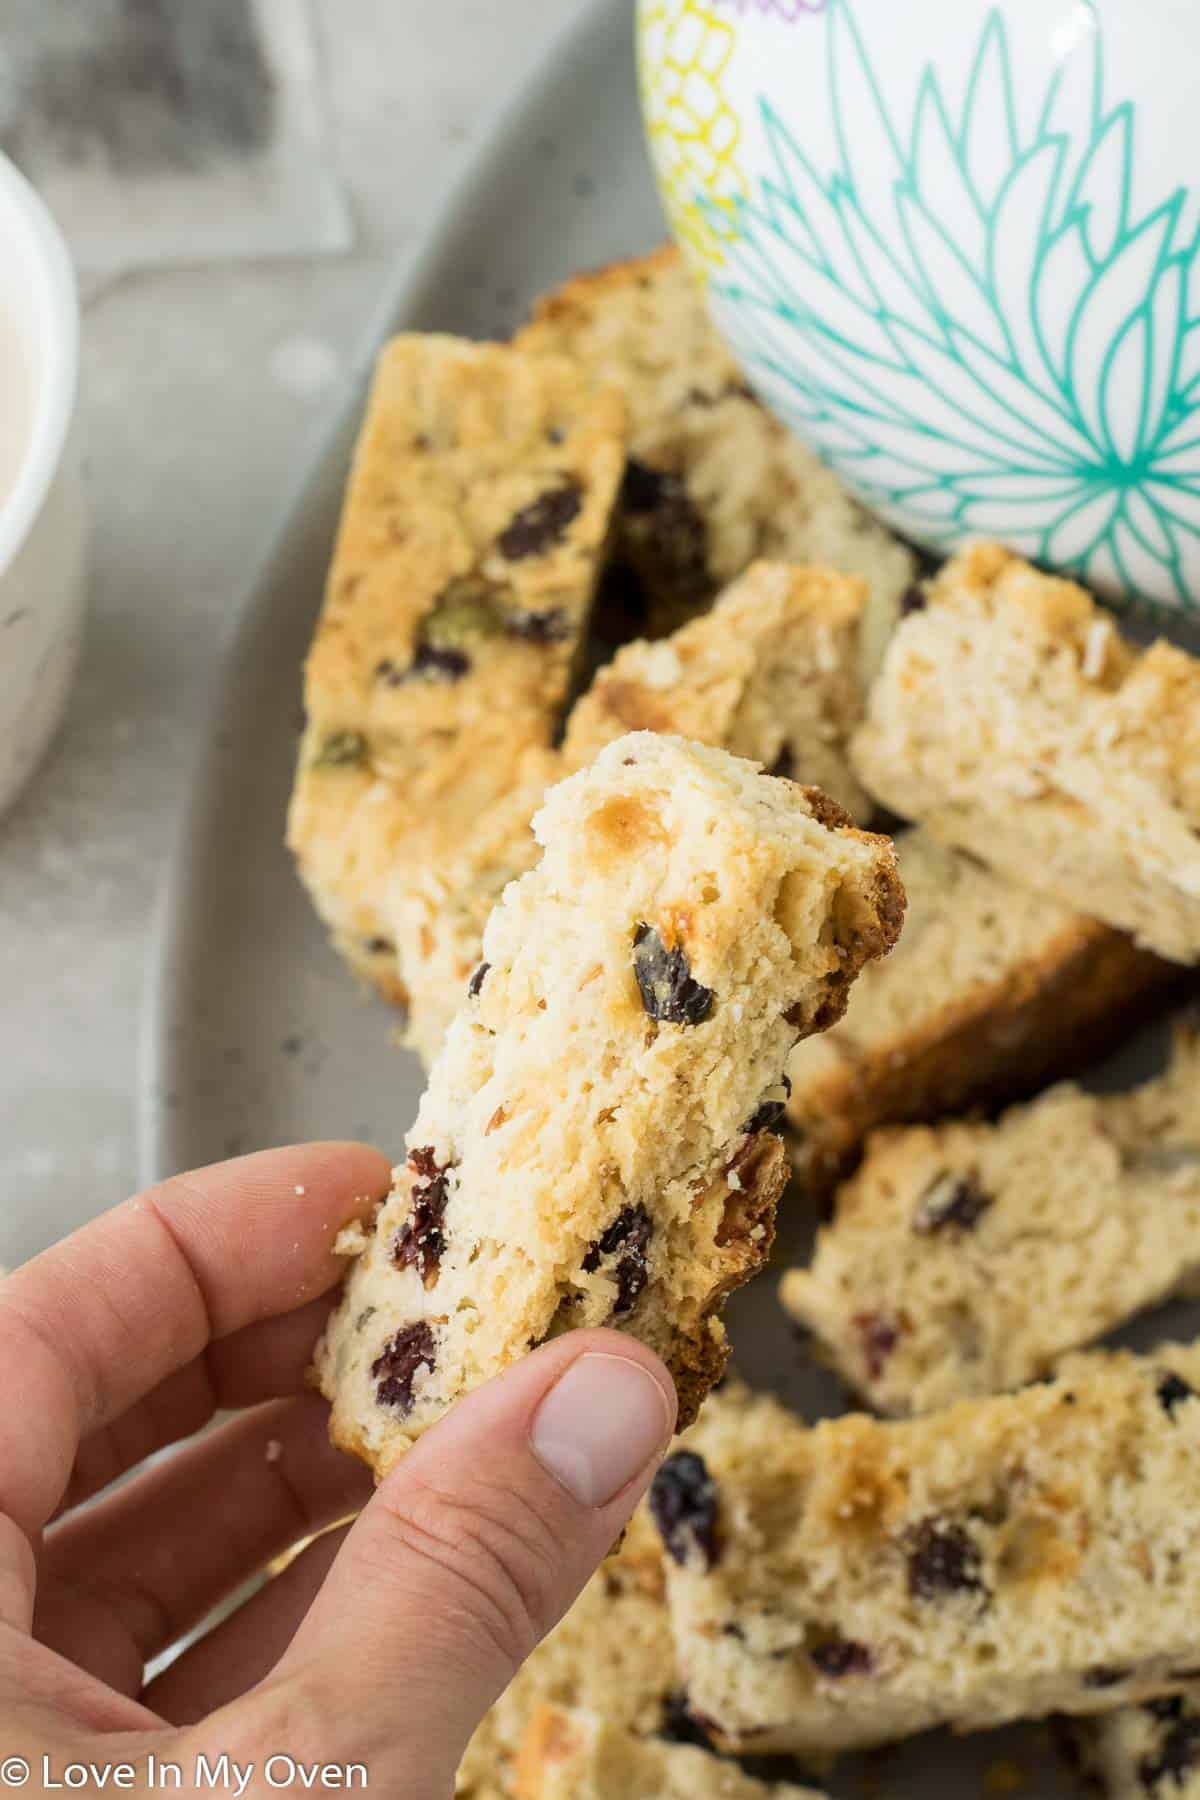
My husband’s favorite way to eat these is to dip them in his coffee, but they’re equally delicious dipped in warm tea or warm milk. My kids eat them dipped in cold milk too!
They’re also terrific to enjoy just on their own.
Some of my other favorite dunkable cookies from the blog:
Print
South African Buttermilk Rusks
- Total Time: 6 hours
- Yield: 25 rusks 1x
Description
These buttermilk South African rusks are a super easy recipe with customizable options! If you love dipping buttermilk rusks into your coffee but just want to make your own, look no further!
Ingredients
- 5 cups all-purpose flour
- 2 tbsp baking powder
- 1 1/4 tsp salt
- 1/2 cup brown sugar
- 1/2 tsp star anise
- 1 cup raisins
- 1/4 cup craisins
- 1/3 cup sunflower seeds
- 1/4 cup whole flaxseeds
- 1/4 cup pumpkin seeds
- 1/2 cup shredded coconut
- 2 eggs
- 1/2 cup honey
- 1/2 cup unsalted butter, melted and slightly cooled
- 1/3 cup avocado oil
- 1 3/4 cup buttermilk*
- 1 tsp pure vanilla extract
Instructions
- Preheat the oven to 350 F and line a 9 x 13 standard baking pan with parchment paper, leaving a bit of overhang on the sides. In a large mixing bowl, whisk together the flour, baking powder, salt, brown sugar and anise in a large bowl. Add in the raisins, craisins, sunflower seeds, flaxseeds, pumpkin seeds and shredded coconut. Stir to combine with a large wooden spoon.
- In a separate bowl, whisk together the eggs with the honey, then add the melted butter (ensure the butter is not too hot or it’ll cook the eggs). Add in the oil, buttermilk and then vanilla. Whisk until completely smooth.
- Slowly add the wet ingredients to the prepared dry ingredients. The dough will be very thick and sticky, but you should not have any remaining dry flour streaks once you’ve combined it all together. If the dough seems too dry, add a small amount of extra buttermilk until there is no remaining dry flour.
- Empty the dough into the prepared baking pan. Smooth out the top as best as you can, and then place the pan into the oven for about 40 minutes or until the edges are only slightly browned.
- Remove the pan from the oven to cool completely, about an hour. Then use the sides of the parchment to lift the rusks out of the pan and on to a cutting board. Use a sharp knife to cut into 24 or 25 smaller pieces. It does not have to be precise.
- Lay the cut rusks on their side on another parchment-lined baking sheet. I usually just use the same parchment I had used in the first bake. Don’t worry about the rusks touching one another.
- Turn the oven temperature way down to 175 F and then place the baking sheet inside. Keep the rusks inside the oven for 5-6 hours or until completely dried. Once completely dry, let the rusks cool down and then store them in an airtight container.
Rusks will keep at room temperature for 3-4 weeks in an airtight container, or up to 3 months in the freezer.
Notes
*See post above on how to make your own buttermilk
- Prep Time: 20 minutes
- Cook Time: 6 hours
- Category: breakfast
- Method: oven bake
- Cuisine: south african


I have the same sentiments, being a Filipino living in New Zealand, all those food items you usually find in Philippines are quite hard to find here and if there is one, it will be expensive, ended up making it at home instead. That buttermilk rusks looks delicious, dipping it in milk sounds like heaven to me.
Hello! I am also a Canadian married to a South African and always on the hunt for a beskuit recipe to call my own!! Do you think I could omit the add-ins if needed? Your recipe sounds delicious to me, but hubby is more of a plain guy! Thanks for your help!
Hi Nicole! If you omit all of the add-ins (raisins, craisins, sunflower seeds, pumpkin seeds, coconut and flax), you will likely need to reduce the liquid as well! I have not tried this but I would start with 1 cup buttermilk, 1/4 cup oil, 1/3 cup butter as alternative amounts. If it looks REALLY dry add in a bit more buttermilk until it is still thick, but not dry. Let me know how it goes! It might just take a bit of playing around.
This is an absolutely rediculous recipe. ‘Proper biskuit’ consists only of flour water butter some yeast sugar salt eggs.
Then the dough is made into buns and packed into a deep tin to bake. After the biskuit is baked it is split into chunks and dried out in an ajar oven.
It must be remembered that the Voortrekkers had few ingredients, so all that other stuff is just rubbish.
Thanks Tessie for your rather unnecessary comments- I don’t believe Katherine ever claimed her recipe was “Proper Biskuit”
Don’t knock her recipe until you have tried it- But maybe being such a fount of knowledge you should start your very own blog- rather than being mean on other peoples blogs.
And to Katherine- thank-you your recipe really helped me to create a very delicious rusk.
Danielle! Thank you so much. I really appreciate your comment and coming to my defence. The internet needs more people like you! I’m glad the rusks turned out well for you 🙂
Hey!
I was recently in South Africa and stumbled across some FABULOUS rusks in a local coffee shop, full of nutty, seedy stuff and so yummy.
I was looking for a somewhat similar recipe and found yours!
Maybe a little tip – in the South African recipe they used ‘treacle sugar’, which is that really dark, unrefined brown sugar. I used dark, moscovado brown sugar, which is great, because it’s so full of minerals. I suspect the recipe would work using only this sugar, but I also included the honey you listed. (‘First time you make a recipe, follow it. Start tweaking the second time around.’:-)
I also liked this recipe because it didn’t call for the HUGE amounts of everything that many recipes use. Good scale to start with!
The rusks are still finishing up in the oven, but I already know that they’re tasty.
Thanks!
Thanks Jen for the helpful comment! I would definitely like to try the recipe with the dark brown sugar and see how that goes.
Many thanks for your amazing recipe.
They are devine and so easy to make.
When I make this recipe my son has first dibs, which does not work out so well as he leaves 6 😁😁
So, 2 to 3 batches satisfies my son, brothers and hubbie.
Me, I will need to wait for the 4th batch😀.
You have spoilt my family.
Hi Katherine!
Loved your recipe, but mine were not fully cooked in the center. They did puff up quite high. Any suggestions?
Then, when I tried drying them out in the oven, without a fan, they got darker, almost too dark.
I’ll be back at the drawing board tomorrow…your recipe is the only one I found with the nutty goodness of the ones I had on safari, in South Africa (I live in Massachusetts, USA), so I really hope I can get it right.
Hi
Just a question: did you put a wooden spoon to prop the door open a bit?
About the baking time: depending on the oan type and size can affect the timing.
I use bread tins so mine bake a bit longer.
My flat pans are quite thick as they are generally used for roasting so I add 5 g 10 minutes to baking time.
Hope this assists you.
These are the best rusks as I prefer the taste and texture to the plain yeast buttermilk recipes.
Enjoy😃